Open Thinkering

Menu

Tag: Keynote

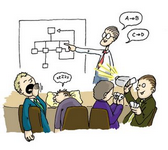
The difference between ‘crowdsourcing’ and being lazy.

Crowd

Image CC BY-NC-SA Samuel Stroube @ Flickr

I don’t usually get involved with things explicitly concerned with education in the USA. But there’s been one issue recently that prompted me to reflect on a wider concern: the difference between ‘crowd-sourcing’ and just being lazy.*

In fact, it’s more than being lazy. It’s taking a concept and twisting it for your own ends to look like you’re doing something you’re not. It’s an attempted shortcut to being seen as ‘innovative’. It’s bandwagon-jumping instead of hitchhiking. ๐Ÿ™

The current Wikipedia definition of ‘crowdsourcing’:

Crowdsourcing is a distributed problem-solving and production model. Problems are broadcast to an unknown group of solvers in the form of an open call for solutions. Usersโ€”also known as the crowdโ€”typically form into online communities, and the crowd submits solutions. The crowd also sorts through the solutions, finding the best ones.

When done well, the results can be outstanding. Take, for example, The Guardian‘s decision to open up and make available the 700,000 documents involved in the UK MP expenses scandal. They received over 20,000 responses highlighting irregularities.

However, crowdsourcing is something that can be done very badly and for the wrong reasons. Take, for example ISTE’s decision to ‘crowdsource’ the Keynote speech for its 2010 conference. On the face of it, and for those involved with ISTE, the idea must look cutting-edge and innovative. It’s got a Digg-like voting system for proposals and has created a buzz about the conference on Twitter and blogs. However, although it looks as if it’s ’empowering’ people, it’s actually doing the opposite.

As Miguel Guhlin points out,

…I’m tired of hitching my carriage behind some writer’s idea of what could be in business but is designed for education since they’re the chosen keynoter. While research may say something, the fact is, research has been speaking up for years in school change and reform…and you know what? People aren’t listening.

Go and read Miguel’s post in full, but to summarize it briefly here, he says that expecting a keynote to change things at the coalface means putting faith in the following process:

  1. Educators go away and learn how to use a tool to the extent that it becomes part of their practice.
  2. The tool is appropriate to use within the context of their school and educators are free to use it as they wish.
  3. Educators are able to get their school leadership onboard and stay at the institution long enough to make a difference.
  4. Parents offer little or no resistence to flattening the walls of the classroom through the use of Web 2.0 tools.

Put in that way, it’s clear that ISTE’s decision is far from revolutionary. As Miguel states, it’s time for a ‘radical reboot’ in national and interational approaches to innovation in education. Isn’t it ironic that we use a lecture format to encourage teachers to be innovative and move away from such a format? ๐Ÿ˜‰

So if you’re a leader and are looking to be innovative, please do look about you to see what others are doing. But once you’ve done that, go back and think about what the objectives of your organization/business/conference/whatever actually are. Then see if the process/innovation/tool that you’ve come across is appropriate. Ask yourself if you’re going through the process/using the tool for the right reasons.

Do you know of any other examples of thinly-disguised laziness?

* That thinking was started by reading Charles Leadbeater’s We-Think: mass innovation, not mass production (my review forthcoming)

Reblog this post [with Zemanta]

HOWTO: Present using Cooliris (the basics…)

Regular readers of this blog and followers of my tweets will be aware that I’ve recently come across (via Alan Levine 1, 2) a great way to present to an audience using a plugin for the Open Source, cross-platform web browser Firefox.* Cooliris makes your presentations look like an interactive version of this:

(examples available in the Presentations section)

Why use Cooliris as a presentation method?

  • It looks extremely cool and engages your audience
  • It generates HTML pages for your images so you can quickly and easily put your presentation slides online
  • It’s free (if you use something like OpenOffice.org to create your images)
  • It can be controlled using a Nintendo Wiimote (I use Darwiin Remote with my Macbook Pro)

The purpose of this post is to show how to create a basic presentation with Cooliris, and then how to enable the more advanced features. ๐Ÿ˜€

Cooliris: the basics

The basic steps are: export your slides as images, import them into PicLens Publisher, and then upload generated folder to web server (optional, as you can run it locally from your hard disk)

1. Export your slides as images

Keynote (click to enlarge):

Keynote - Export (thumb) Keynote - filetype (small)

Powerpoint (click to enlarge):

Powerpoint - Save as Pictures Powerpoint - Image options

OpenOffice.org (click to enlarge):

OpenOffice.org - Export OpenOffice.org - export format openoffice03_small

OpenOffice.org - HTML format OpenOffice.org - JPG quality Create

As far as I’m aware, although the options would suggest otherwise, there’s no obvious way to export all you slides to images in OpenOffice.org. Instead, we can generate them by creating an HTML version of the presentation which will also create images. As a bonus, this can be uploaded alongside the Cooliris version of the slides for those without the plugin. ๐Ÿ™‚

2. Use PicLens Publisher

Cooliris used to be known as ‘PicLens’ – hence the name of PicLens Publisher, a Mac/Windows program that does everything you need to convert your images ready for an interactive Cooliris-powered presentation!

Simply follow the instructions given to you in the program:

PicLens Publisher

Once you’ve finished, go to the folder that you exported your files to and open gallery.html in Firefox (with the Cooliris add-on). You should see an interactive presentation like the ones I produced!

3. Upload your files to a web server (optional)

If you want your presentation to be online, do the following:

  1. Rename the folder containing your PicLens Publisher-created files to something without spaces (e.g. preso)
  2. Rename gallery.html within the preso folder to index.html
  3. Connect to your web server and navigate to where you want the preso folder uploaded to
  4. Upload the preso folder generated by PicLens Publisher to your web server

Upload preso to web server

That’s it! You’ve created your first Cooliris-powered, interactive presentation. Details on how link to websites from your slides, name them, customize the icon at the top, and use a Wiimote to present will feature in a follow up post. ๐Ÿ™‚

* Cooliris is also available for Internet Explorer and Safari, but I’m not entirely sure why you’d want to use those… ๐Ÿ˜‰

Beyond boring Powerpoint presentations.

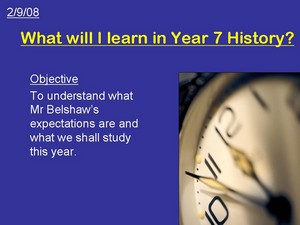
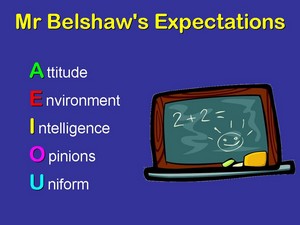
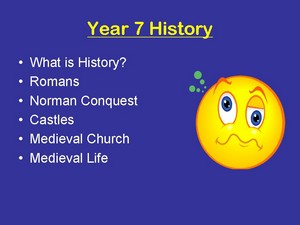
It’s easy to create a bad Powerpoint presentation. That’s because it’s easy to be fooled into thinking that because your audience is looking at something, they’re engaged with and by it. What is gained in clarity can be lost in repetition and boredom. Below are some ways to use Powerpoint more effectively and alternatives to spice up your content delivery.

First, though, here’s Don McMillan explaining some of the REALLY bad ways people use Powerpoint:

This text will be replaced

var so = new SWFObject(“http://www.edublogs.tv/flvplayer.swf”,”mpl”,”450″,”355″,”8″);so.addParam(“allowscriptaccess”,”always”);so.addParam(“allowfullscreen”,”true”);so.addVariable(“height”,”355″);so.addVariable(“width”,”450″);so.addVariable(“file”,”http://www.edublogs.tv/uploads/xvvgpn8zukcgkwgx.flv”);so.addVariable(“searchbar”,”false”);so.write(“player”);

5 quick tips if you MUST use Powerpoint…

  1. Never use a font size smaller than 24pt. If you have a large classroom, you may need to go even bigger than this. Stand at the back and check!
  2. Limit the number of words you have per slide. Don’t use them as an aid to remind you what to say. They should enhance what you are talking about, not repeat it! A great way is to limit yourself to 5 words and 5 bullet points. Alternatively, just use an image to represent your idea/concept/instruction.
  3. Find graphics that represent things you do frequently in lessons (perhaps from clipart) and always use these when doing a similar activity. For example, a pen writing for when it’s time to start work or two people talking for discussion/group work. These help reinforce good habits and aid classroom management.
  4. Use contrasting colours. The easiest way to do this is to choose an option from the ‘Slide Design’ menu. Otherwise, remind yourself of the colour wheel.
  5. Limit the number of different slide transitions in a presentation. One or two is classy, lots of different ones looks unprofessional.

Beyond Powerpoint…

There are lots of different tools that do a similar job to Powerpoint. For example, Keynote on the Mac and OpenOffice.org Impress (all platforms). But you don’t want to simply replicate Powerpoint’s functionality, you want to move beyond it.

Method 1 – Online presentations

Creating presentations on, or uploading presentations to, the Internet can be extremely useful. Not only does it give you access to better visual effects than Powerpoint can offer, but it makes them readily available to your students outside the lesson. The following three slides are taken from part of the very first lesson I had with Year 7 this academic year:

This is the same presentation when I uploaded it to Google Docs and tinkered slightly:

And here it is in the wonderful SlideRocket after using some of its functionality:

Zoho Show is another option. All of these are completely free or have a free basic option. I’d recommend Google Docs if you’d like to collaborate (or students to collaborate) on presentations and SlideRocket for fancy effects. The latter has a desktop version, although you have to upgrade your account to a paid-for version to be able to download it. Of course, if you just want to make your presentations available online, you could use SlideShare

Method 2 – Add interactive elements

  • Need to show some statistics and figures? Try richchartlive.com!
  • Add a short video clip to your presentation. Find it on YouTube, or another video-sharing site. Download and convert it (in this case to MOV or WMV format) via Zamzar.com. There’s an elearnr guide on how to do this here. ๐Ÿ™‚
  • The PicLens plugin for Powerpoint 2007 means you’re not restricted to a linear presentation – and it looks cool! (see below)

Method 3 – Use a completely different approach

Ask yourself, “do I really need to use a Powerpoint-style format?”. If the answer is “perhaps not!” then check out some of these suggestions:

  • Glogster – we’ve already been through glogs on elearnr. They are a great, visual way to present as you can embed videos, audio and images quickly and easily.
  • Mindmap – why not demonstrate good practice and create a mindmap to present ideas? Students can learn organizational skills from this, and there are a number of collaborative mindmapping sites, including MindMeister, bubbl.us, Mindomo and Mind42.
  • Wiki – a wiki is a collaborative website. It’s also a great place to embed content from other websites and therefore a useful presentational tool. Your audience (i.e. students or other teachers) can also add their ideas and thoughts to it at a later date – if you want them to! I like Wikispaces, but it doesn’t seem to play nicely with our school network. I’d recommend, therefore, Google Sites, Wetpaint and PBwiki. I use Google Sites to run learning.mrbelshaw.co.uk ๐Ÿ™‚

Finally…

Keep up-to-date with new ways and ideas for presenting ideas, concepts and content. The following are websites that can help:

Have YOU got any tips to share about good/bad practice when using Powerpoint?

css.php