 I’m looking forward to the new academic year. Having said that, I’m not hugely excited about the Web 2.0 tools I’ll be using next year – and I believe that’s a good thing. It shows that such tools have become part of my teaching ecosystem. As I read recently, “The music is not in the piano.” (i.e. it is but a tool, just like technology)
The only reason my teaching ecosystem isn’t 100% digital is because of outside influences: documents from colleagues and marking student books. It’s part of my aim for my E-Learning Staff Tutor position to put more digital tools in the hands of colleagues. I’ll be using the new elearnr site to help with that. 🙂
This week I came across Top 100 Tools for Learning 2008. It’s made up of a large number of educators’ top 10 lists of elearning tools. I haven’t tried to stick to 10 in what follows – it’s just a list of what I’m going to be using (in order of what I’ll be using most!) 😀
1. Google Calendar
I’ve been using Google Calendar for a couple of years now for my day-to-day planning (see here and here). Although it takes around half an hour to enter your timetable initially, you can then set this to repeat until a certain date (i.e. the end of the academic year).
I use a ‘double-star system’ (see screenshot below). Before a lesson has been planned it has two asterisk after it. Removing one star means that I’ve entered the title and lesson objective (and homework, if applicable). Removing the second star means that the lesson is fully planned.

After the lesson, if there’s anything I need to remember for the next lesson with the class, I just add it to the comments section.

Obviously things like meetings, parents evenings can be entered ad-hoc. As you can access Google Calendar via mobile phone as well, it means I’ve got my day-to-day planning everywhere. 🙂
2. Attendance/Homework checkers
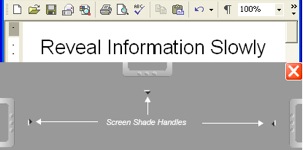
I run a two-laptop classroom. I’ve got my school-provided laptop at the front of my classroom running the interactive whiteboard (a SMARTboard) and my netbook (an MSI Wind-like Advent 4211 now running Mac OSX) is for everything else.

Whilst I could use Google Spreadsheets for my attendance registers, there’s two reasons I don’t. First of all it just doesn’t update very quickly, being web-based. Second, I’ve got to have a register – even if Internet access goes down at school. So I use Microsoft Excel with some conditional formatting goodness that I blogged about ages ago.
3. Google Docs

I’d be the first to hold my hand up and say that I’m a last-minute planner. What I do in the next lesson with a class depends very much upon what happened in the previous. Students have different questions and things can go off at a tangent. That’s not to say I don’t medium-term plan, however!
For my medium-term planning I use Google Docs. Nothing fancy, just a table with columns for lesson title, objective and possible content. The great thing about this is that I don’t have to remember to back it up and I can drop in links to any online resources quickly and easily. I do about a half-term at a time, having worked out before how much I need to cover to get everything done within the year. :-p
4. Evernote

You’re not going to believe this but my school still doesn’t use email as the primary method of contact between members of staff. Hard to believe, I know! Consequently, I’m overwhelmed by a deluge of paper. To counteract this, I started taking a photograph of the documents using the camera in my Nokia N95. The trouble was that organizing these images was difficult and time-consuming. In the end, I just gave up.
Then I was invited to take part in the private beta for Evernote. This program is available cross-platform and is now out of beta, so it’s available to everyone. It takes the image you’ve taken and transferred to your laptop (e.g. via Bluetooth) and recognises the words – even when they’re hand-written! You can add tags to the photos and they’re automatically (securely) synced with your account on their server. That means they’re available wherever you’ve got an Internet connection.
Evernote’s a great system no matter what phone/digital camera/laptop combo you’ve got, but if you’ve got an iPhone, you really do need to download it from the App Store!
5. Google Presentations


Sometimes I feel a bit guilty for still using Powerpoint. After all, I’m training colleagues to use software such as SMART Notebook when I rarely use it myself. The truth is, Powerpoint is compatible, flexible, and has great clipart.
The problem comes when you want to get a Powerpoint online. Say that you’ve drawn on top of a diagram and want to make it accessible for students outside the classroom. In the past I’ve had to use OpenOffice to convert it into Flash, upload it to my website, and then create an HTML page in which to embed it.
Not any more. Now I just upload it to Google Docs and it’s transformed into a Google Presentation. This can then be easily embedded into a blog, wiki or website. Marvellous! 🙂
6. Google Sites

I used a self-hosted installation of WordPress for a couple of years successfully at learning.mrbelshaw.co.uk. That’s the place I direct students to in order to access homework activities and resources to aid their learning. At the end of last academic year, however, I switched over to Google Sites. My version actually comes as part of Google Apps Education Edition, but there’s no advantage in this other than the ability to customise the domain name.
I’ve found it really useful and reliable. Because it’s hosted by Google, I’ve never experienced any downtime and, of course, it’s not blocked by the school network’s proxy. You can edit things in a straightforward, easy-to-use manner. The built-in navigation features make it simple for students to navigate. Embedding objects is easy – I could ask for any more! 😀
7. Twitter

I’m disappointed that Twitter, the micro social-networking service, has made the decision to stop the ability to receive SMS updates when you receive direct messages or replies. It means that I’m unlikely to use it with my GCSE students this time around.
To neglect to add it to my list, however, would be misleading. I’ll still be using it both in and out of school in a professional development capacity. I can’t imagine being connected only via blogs now (as in the early days of the edublogosphere). Twitter and other real-time tools make professional development fun!
8. Edublogs

With my last cohort of GCSE History students I installed WordPress Multi-User (WPMU) edition at mrbelshaw.co.uk. Whilst it worked fine and the students took to it well, the system took some configuring and was a bit of a nightmare when I transferred web hosting companies.
This year, I’m going to be using Edublogs. It, after all, is a giant installation of WPMU, but they host it for you, make hundreds of themes available and there’s added values with wiki and forum integration (to name but two). It should cut down on hassle. I track what students are up to via the RSS feed for the blog entries and comments. 🙂
9. Google Earth

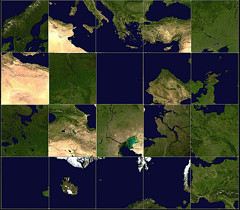
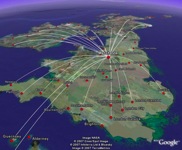
It’s fair to say that I use Google Earth a lot. In fact, when I had to teach Geography to a Year 8 Set 4 class last academic year, I think I used it every lesson! It’s also of great use in history as it’s so much more than a mapping application; the ‘layers’ and ability to create tours add huge amounts of value.
I’ll be using it next academic year, as I have in previous years, to plot the route of Hannibal’s march with elephants on Rome, doing a flyover tour of Engladn in 1066, building up the tension of the Cuban Missile Crisis, and a lot more. I’ve shared some of the resources I’ve created for Google Earth over at the historyshareforum.
10. Simple English Wikipedia

Although I’ve threatened to do it a couple of times before, this academic year is going to be the time when I carry through my plan. I want students to be creators and contribute to the Internet. In Years 10 and 11 whilst they’re doing their GCSEs, I get them to blog. But what about in Key Stage 3?
I’m going to get them to add to the Simple English Wikipedia. This lesser-known sibling of Wikipedia is for children and foreign language students. Every page on the main Wikipedia site (potentially) has a similar page on the Simple version. The trouble is that the Simple version doesn’t have as much content – I want to rectify that by getting my students to edit that.
The main problem with this is that they can’t do it at school. I’m sure it the same with most educational institutions: our IP address is banned from editing do to ‘vandalism’ of Wikipedia by a minority of immature students. So, I’ll get them to do it at home and look at the revision history of the page for proof! I’ll let you know how it goes… :-p
11. bubbl.us

I’m a big fan of mindmaps. Although I’m not convinced that bubbl.us creates mindmaps in the true sense of the term they are, at least, very useful brainstorms. If you haven’t given online, collaborative mindmapping/brainstorming a try with your students, I’d suggest you try.
Due to a re-organization of the core subjects at our school, students only get to choose two options for GCSE. This has the knock-on effect of meaning they have 4 lessons to cover content that previously was covered easily in 3. I’m going to spend that fourth lesson with them in the library or an ICT suite blogging, brainstorming/mindmapping, and more…
12. Posterous

I came across Posterous during the summer holiday (see this post). You couldn’t really ask for a blogging service to be made much simpler. All you do is email [email protected] and it intelligently sorts out what you’ve sent (including attachments) and displays them appropriately. At last I can say to staff that if they know how to email they can set up their own class blog!
If you read my previous post on Posterous, you’ll see that I feel the killer feature will be themes. They’re adding features all the time, it being a new service, and if they add this ability before the start of the academic year (1st September for me) then I’ll seriously consider using them with students too. It might seem shallow, but I’ve found that teenagers like to create an identity online, and the ability to make their site different from their friend’s is important to them.
Finally, I’ll be charting my progress and adding resources to help colleagues as part of my E-Learning Staff Tutor role over at elearnr. Do visit there often and/or subscribe to the RSS feed. 😀
(Image credit: Personal Ecosystem by activeside @ Flickr)

![Reblog this post [with Zemanta]](http://img.zemanta.com/reblog_e.png?x-id=9ff0f086-35be-4e64-bf8b-5eb456ee1817)
![Reblog this post [with Zemanta]](http://img.zemanta.com/reblog_e.png?x-id=7f2195b2-2959-4c6b-90d6-490bec0958fa)