
Instead of attaching documents to emails, why don’t we attach email addresses to documents? That way, everyone sees each update of a document (e.g. a scheme of work) and there is a central repository for departmental or school files.
Watch this video:
This text will be replaced
var so = new SWFObject(“http://www.edublogs.tv/flvplayer.swf”,”mpl”,”450″,”355″,”8″);so.addParam(“allowscriptaccess”,”always”);so.addParam(“allowfullscreen”,”true”);so.addVariable(“height”,”355″);so.addVariable(“width”,”450″);so.addVariable(“file”,”http://www.edublogs.tv/uploads/sqadikkuwb38vs5w.flv”);so.addVariable(“searchbar”,”false”);so.write(“player”);
Google Docs is part of a wider suite known as Google Apps. There’s a version of this called Google Apps Team Edition that allows only those within an institution or business to collaborate on documents. You can access Ridgewood’s login page here. Only those with an @ridgewoodschool.co.uk email account can access this (which includes pupils, so be careful who you share documents with!)
Step 1

Sign up for an account. Follow the instructions using your school email address.
Step 2
Login to the Ridgewood Google Apps dashboard using the username/password set up in Step 1. You might want to bookmark this login page for ease-of-access next time!
Step 3
In the dashboard area you have several options, the rest of which you can explore at your leisure. For the moment we’re interested in Docs, so click on that!

Step 4
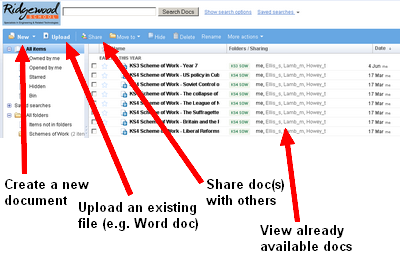
The Docs overview area is fairly straightforward. Documents which have been shared with you are accessible to the bottom-right. You can click on the toolbar to create a new document/spreadsheet/presentation/form/folder, upload existing documents (in Word .doc format, etc.), and share these with others:
Step 5
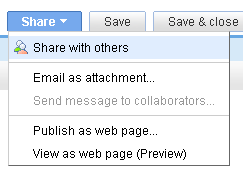
Once you have created or uploaded a document, click on the blue Share button to the top-right of your screen in the editing window. Then click on Share with others:
Step 6
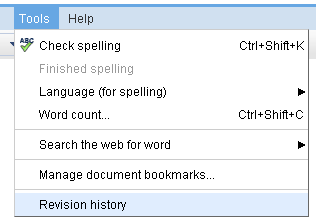
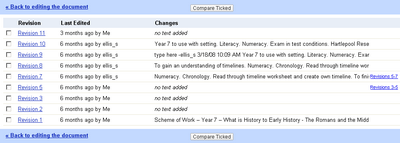
You can view the ‘revision history’ of the document by going to Tools/Revision history in the editing window. This shows every change that has been made to the document. You can revert to any previous incarnation of a document if necessary!
Step 7
Play! Explore what Google Docs can do. Once you exhausted that, have a look at the rest of the offerings within the Google Apps suite – Sites (easy departmental websites), Calendar (plan course/departmental/school events), Start Page (customised ‘home page’) and Chat (real-time text chat like MSN Messenger)

![Reblog this post [with Zemanta]](http://img.zemanta.com/reblog_e.png?x-id=291d54e7-b202-4202-a831-fb6346e7972d)
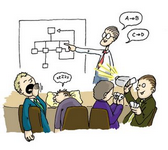 It’s easy to create a bad Powerpoint presentation. That’s because it’s easy to be fooled into thinking that because your audience is looking at something, they’re engaged with and by it. What is gained in clarity can be lost in repetition and boredom. Below are some ways to use Powerpoint more effectively and alternatives to spice up your content delivery.
![Reblog this post [with Zemanta]](http://img.zemanta.com/reblog_e.png?x-id=15aff1f1-0071-49e4-a7af-1bc8483d3a97)