
Building an iPod for 2023
Update (12/1/23): this project is now complete!
Inspired by this post, I decided over the holidays to upgrade a 5th generation iPod Classic (17 years old!) with more modern parts. It’s been a while since I owned an iPod, so I had to buy one — along with a few other things:
- Black iPod 30GB 5th Generation in working condition (eBay)
- 1TB Integral M.2 SATA drive (Amazon)
- iFlash SATA converter (iFixit)
- Rear (thick) housing (eBay)
- Front housing (eBay)
- Clickwheel + button (eBay)
- 3000mAh battery (eBay)
- Belkin charge + sync cable (Amazon)
That little lot cost me in the region of £200. As you’ll see below, I had to buy a new LCD display (£22) and I’ll need to buy new front housing (£17) but it’s still a lot cheaper doing it myself than buying one ready-made. It’s also massively more fun.
Side note: I don’t think I’ll ever fill 1TB of storage space and 256GB would have been more than enough, but ¯\_ (ツ)_/¯
For anyone thinking of doing this and a bit apprehensive about taking an iPod apart: don’t be! Although the screws are tiny, so long as you’ve ever taken anything apart before, you’ll be fine. Just don’t lose those screws!
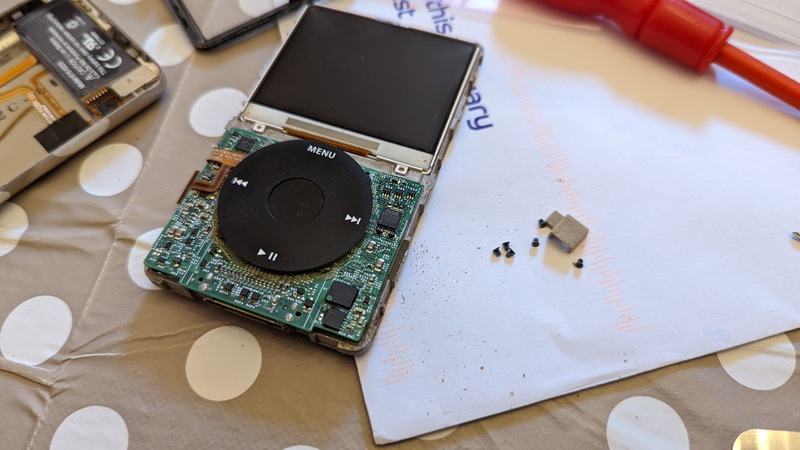
I bought a 5th Generation iPod Classic because it comes with the Wolfson DAC which is supposed to sound better. Opening up the case and swapping out the hard disk for an SSD (with the help of the adapter) was really straightforward.
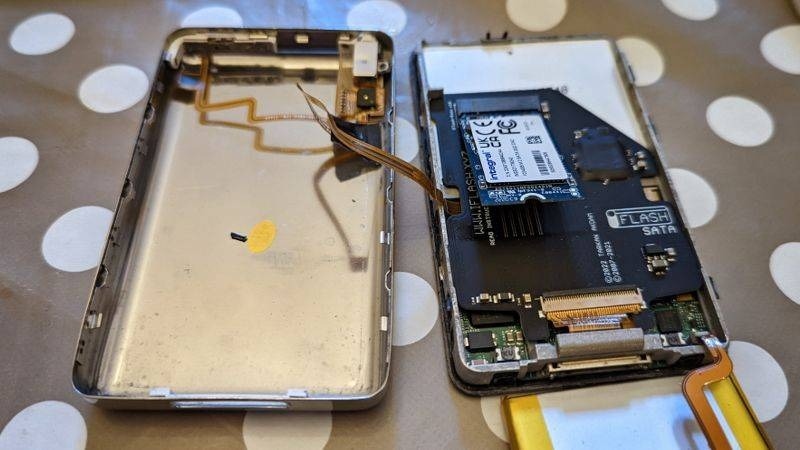
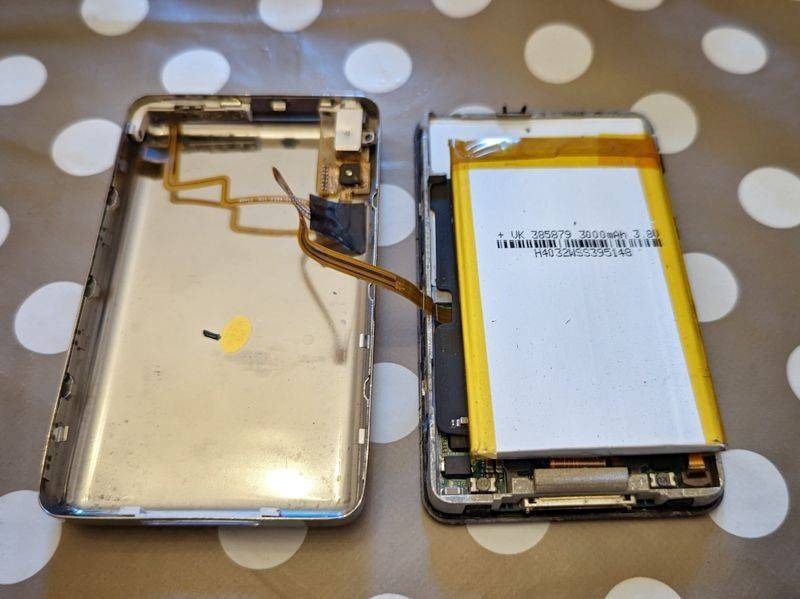
For some reason, the latest version of the iFlash adapter doesn’t have a little notch to keep the SSD pressed down and in place. So I was pleased that the larger capacity batter was also larger in size and therefore kept the SSD in place. This was all made possible by purchasing a ‘thick’ replacement rear casing (I chose not to have the capacity engraved on it).
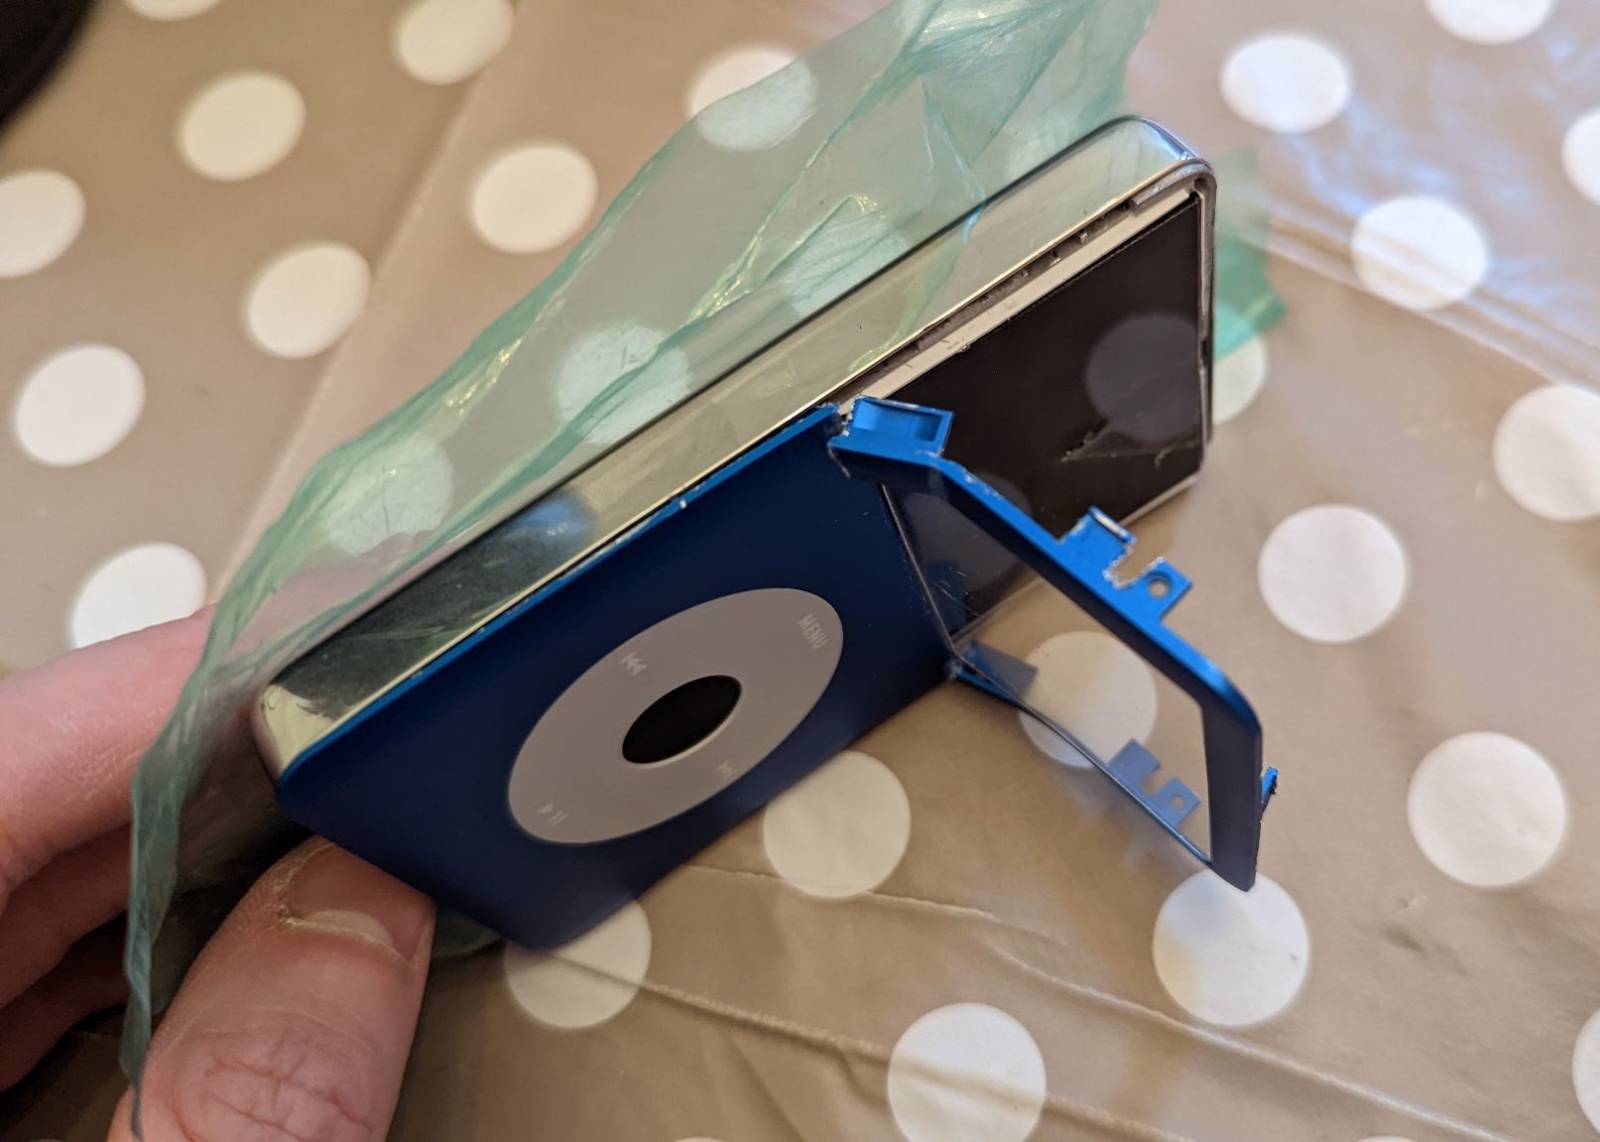
Initially, I wanted a blue metal front casing which is entirely on-brand for me (I wear blue most days and drive a blue car). However, I accidentally bought a 6th-generation version which has clips in slightly different places to the 5th generation. As you can see in the photo below, I took a hacksaw to it, which kind of worked…
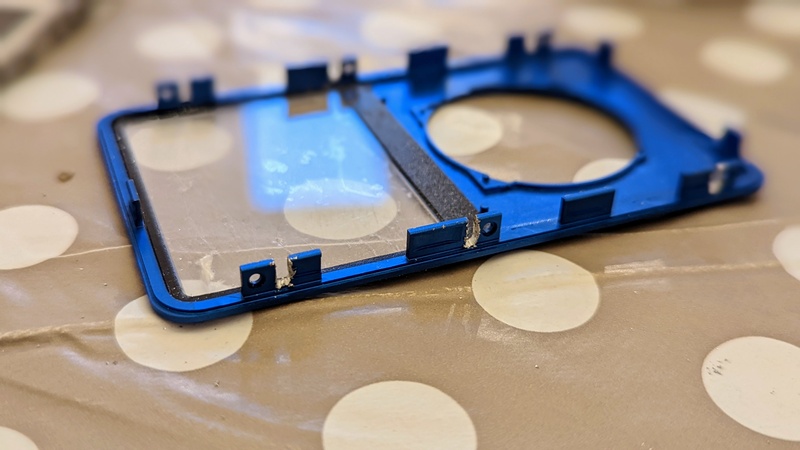
As it wasn’t a perfect fit, I had to apply more force than usual to get it to snap together and, in doing so, I broke the LCD screen. So while the thing worked, I couldn’t do anything with it.

The replacement LCD screen came mercifully quickly (next day!) but it took me a while to remove the front housing. I destroyed it in the process. Silly me.
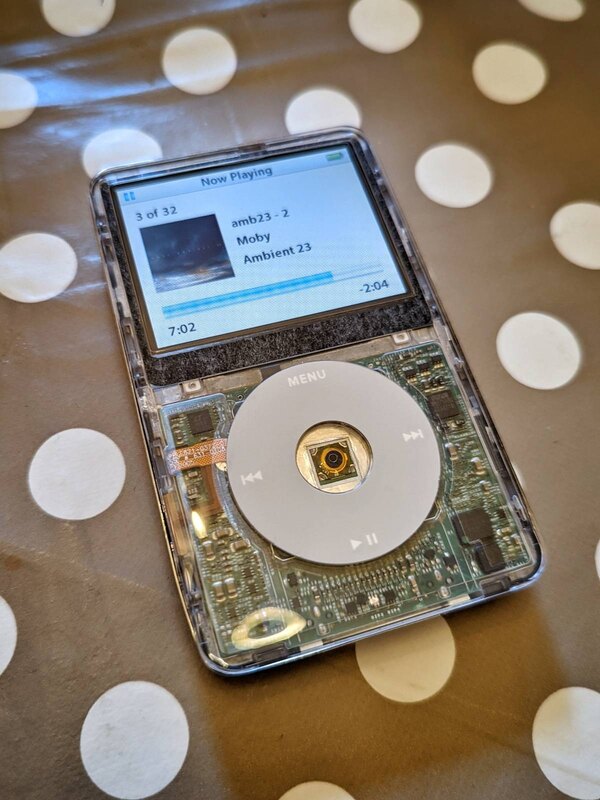
I ordered a new transparent front casing which came with a clear click button. Adding that into the mix, as it was 5th-generation compatible was easy. So now it looks like this…
I’m really pleased with it! The reaction of my wife and kids ranged from “why don’t you just use your phone?” to “you spent how much?!” but I know that this wasn’t just a nostalgic project for a middle-aged man. Single-use devices still have their place: e-readers, for example, are used partly because they’re a distraction-free experience.
I’ve started keeping my iPod next to my bed and, in the middle of the night or early in the morning, I pop in my headphones and either listen to music or an audiobook. This morning I was listening to the dulcet tones of David Attenborough informing me of how life on earth started. I don’t sleep with my phone in my bedroom, as it’s too distracting, so I would never otherwise be able to do this! And for long walks and travel it’s going to be amazing.
Ideally, I’d like to get the Rockbox firmware installed as it can deal with larger databases than the original Apple firmware. However, from what I’ve read that requires restoring the iPod (not just formatting it) using FAT32 using iTunes on Windows. So that’s a bit of a roadblock for now.
Awesome sauce
Thanks!
Cool project!
I’ve wanted one of these for a while but all my headphones are bluetooth now, unfortunately.
Yeah, mine too, but this will mainly be for longer walking trips so I don’t cane my phone battery! I’ll have to either dig through the man drawer or buy some new wires ones, I guess!
So cool! I wanted to do this with my own iPod classic I have owned since new. I’ve not got the gumption up to lever it apart yet!
I tried installing RockBox on it, which boots and works but randomly skips tracks while playing all the time. I have deduced from some reading that this may be to do with the need to restore the iPod using iTunes you mention. I tried doing this with an old, old Mac but it hasn’t fixed the problem. I thought maybe that meant the HD was damaged and I should just replace with a card like you have, but perhaps that’s not the case.
Fun project – you’ve inspired me to get back to it!
There is something to be said for single function devices. The only one that seems to be mainstream these days is the kindle.
I’m really pleased with it, and the sound quality is just amazing. I’d definitely encourage you to have a go at upgrading you’re – especially as you’re a more careful person than me in general 😅
Doug, thank you for sharing these instructions, photos, and commentary. In the guide you linked to, the writer mentions that he chose an adapter that used SD cards instead of an SSD drive because of the power consumption. Are you happy with the battery life with an SSD drive?
Hey Will, thank you! I saw that, but then I’ve upgraded to a 3000mAh battery which is 5-6 times the capacity of the original. I haven’t ‘charged’ the iPod yet since upgrading it, although it’s been connected to my Mac for MP3 transfer.
Thank you, Doug! I saw that you upgraded the battery. If I get enough courage I may follow in your footsteps!
Be very careful opening the case. I’ve literally just damaged *another* LCD screen by applying too much force 🤦♂️
awesome and inspiring!
Thanks Dave!