HOWTO: Issue #openbadges in 5 steps using WordPress + WPBadger
Image slideshow not showing? Click here!
Good news! Dave Lester has created a plugin for WordPress that makes issuing Open Badges fairly straightforward.
Follow the instructions below to get started.
1. Install WordPress*
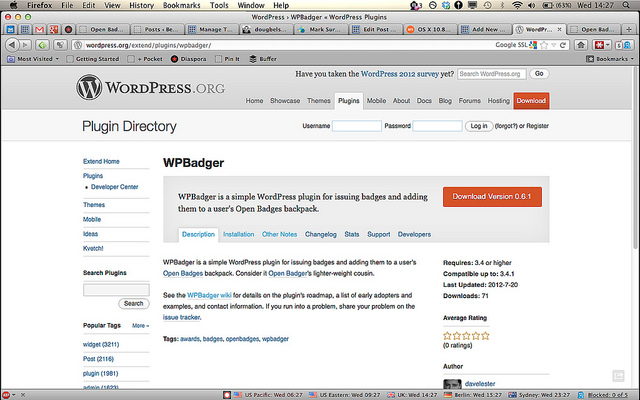
2. Install the WPBadger plugin
3. Follow the instructions at the plugin’s Installation page, specifically:
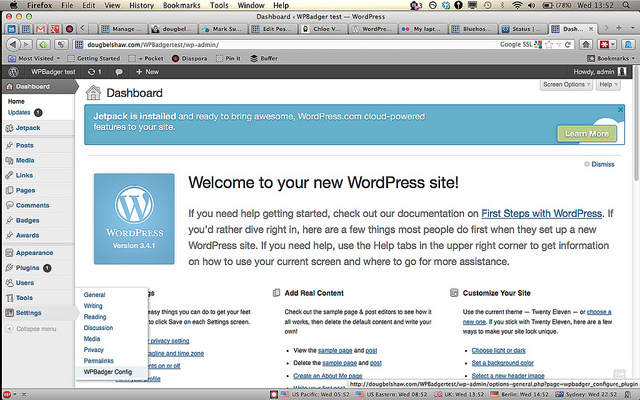
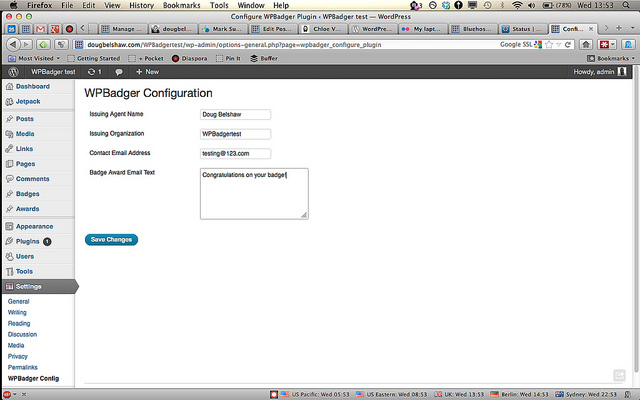
Configure the plugin by navigating to Settings -> WPBadger Config in the WordPress admin. On this form, fill out some basic information including Agent Name, organization, and contact email address. The award email text is optional.
Note the following:
- After you install the WPBadger plugin you get two new menu items – Badges and Awards
- Badges is to do with the creation of badges and Awards is to do with the awarding of badges (either individually or en masse)
4. Follow the instructions on the Other Notes page to create your badge.
Things that may help:
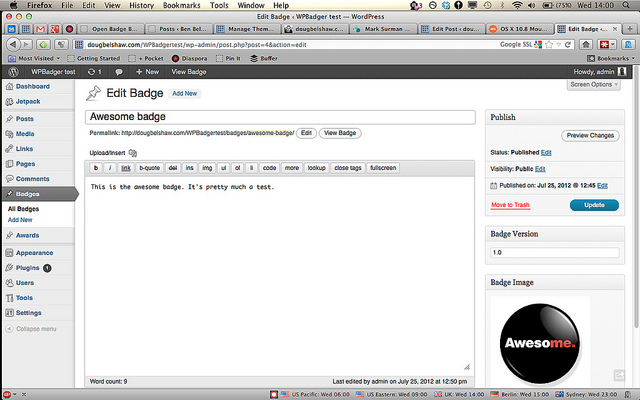
- Click on Badges in the left-hand menu then Add New
- Fill in the Enter title here box (this is the name of the badge as it will show up in Badge Backpacks)
- Enter some text in the main field about the badge itself and what it’s awarded for (this is what will show up at the badge’s Criteria URL)
- Under Badge version on the right-hand side enter a number such as 1.0
- Under Badge image on the right-hand side click on Set featured image
- Once you’ve uploaded the badge image (a PNG file) you need to scroll down in the pop-up box to click the option to Use as featured image and then close the pop-up (you don’t need to insert it into the post)
5. Follow the instructions on the Other Notes page to award your badge.
Things that may help:
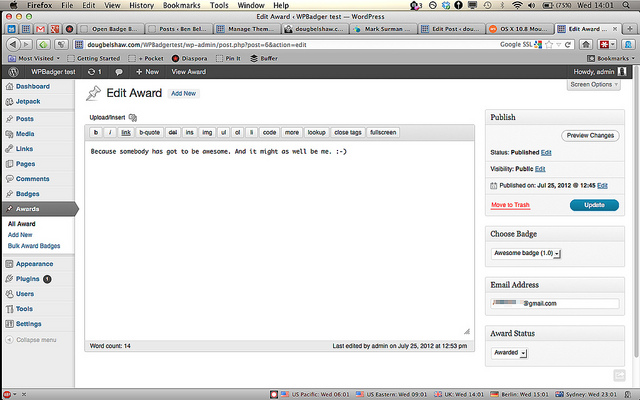
- Click on Awards then Add New to award a badge to a single individual
- Use the drop-down menu under Choose Badge on the right-hand side to select the badge to award
- Enter the individual’s Email Address in the box on the right-hand side (try your own email address first if testing!)
- In the main box fill out the reason why the individual has been awarded the badge (this is what will show up at the badge’s Evidence URL)
- Press Publish
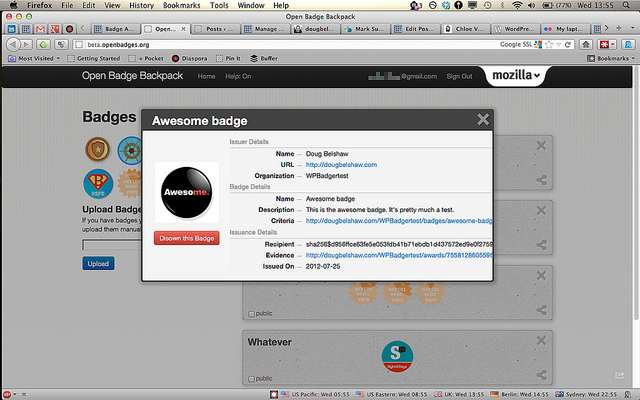
The individual you entered in Step 5 should now receive an email telling them they’ve received a badge. When they click on the URL they can accept or reject that badge. If they accept it then it will be pushed to their Badge Backpack.
*How to do this is outside of the scope of this tutorial, I’m afraid.

Thanks for the blog post about this, Doug! I’m pleased that you found it easy to install and use.
Thank YOU for the awesome work! 😀