Open Thinkering

Menu

Tag: Wordpress

How to ensure your blog posts last forever.

TL;DR version: Register your own domain name, find some server space and install Open Source software. It’s harder than using someone else’s shiny service, but you’re in control. It’s worth it.


I found out today (via Drew Buddie) that Posterous is shutting down at the end of April. While this is a sad state of affairs – I used it with students in the classroom and found it a great email-based blogging platform – it was hardly unexpected. The co-founders moved to Twitter last year and the assumption was that they would close Posterous at some point.

John Johnston, who used Posterous extensively (not least for podcasting) has written about why it was such a great platform. In an update to that post he points towards Posthaven, effectively a subscription-based clone of Posterous started by a couple of other co-founders. It promises to be the ‘safe place for all your posts forever’. Yeah, right.

The only way you can ensure that the stuff you produce online stays online is by owning your own data. It’s as simple as that. So when you’re looking for a blogging platform, by all means have a look at the sexy options like Tumblr and the like, but the most important thing is how easy it is to get your data in and out of the platform. That’s why I like WordPress (both the hosted and self-hosted versions) so much.

Knowing how to own your own data and keep it available online fits right onto the Web Literacies framework I’ve been developing at Mozilla. But it’s not rocket science. It takes effectively three steps:

  1. Buy a domain name (I use 123-reg)
  2. Find some web hosting (I use Hippie Hosting)
  3. Install an Open Source platform (I use WordPress via a one-click CPanel installation process)

The reason the last of these is important is that it’s extremely difficult – if not impossible – to completely shut down an Open Source project. Once the code is out there, it’s out there and anyone can contribute or ‘fork’ the project.

Thankfully, like many people, I could see the writing on the wall with Posterous and moved the blogs I had there (a now-defunct ‘Ideas Garden’, my conference blog, and my FAQ) to WordPress blogs hosted on subfolders of dougbelshaw.com.

This stuff isn’t hard. Trust me. And you’re always better off in control of your own data.

So, be in control of your own domain. Find out how to control the blogging platform you use. And use Open Source software. You’ll thank me for it in the long term! 🙂

Blog redesign: October 2012 edition

(Email and RSS subscribers will need to click through to see the change)

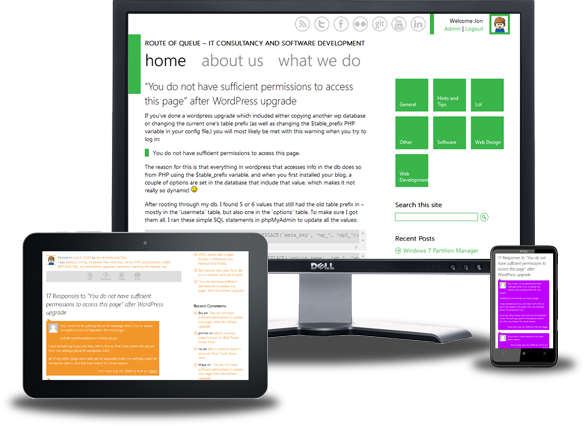
I’ve felt for a while that I should make this blog better suited to mobile interfaces and, in particular, touchscreen devices. This is known as responsive web design and I’ve been particularly impressed with Microsoft’s ‘Metro’ design language leading to a tiled approach on Windows smartphones. To my eyes it seems streets ahead of Apple’s skeuomorphism.

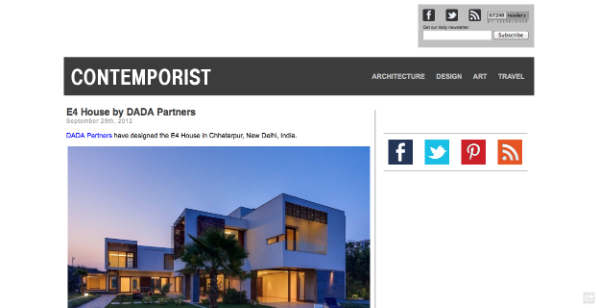
Yesterday, when I was browsing architecture blogs and came across the Contemporist site, it reminded me of that clean, touchscreen-friendly approach:

Contemporist blog

I did something I always do when I see blog themes I like: right-clicked to ‘View Source’ as you can tell which blog theme is being used. Judging by the CSS it’s a custom job, meaning I couldn’t simply download the same theme.

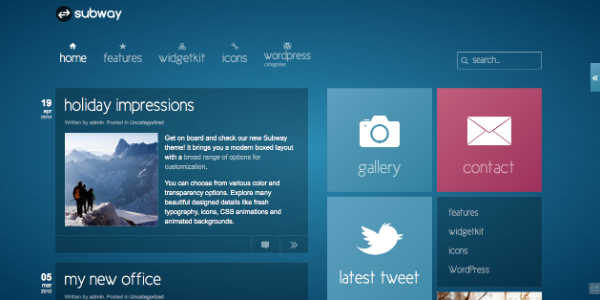
That was a shame, but it spurred me on to look for Metro-inspired blog themes. I was looking for something with a tiled, fairly squarish look but that didn’t scream Microsoft. Beautiful though it is, the Subway WordPress theme (from €39) was out of the question. I’d have looked like a Microsoft fanboi:

Subway Metro theme for WordPress

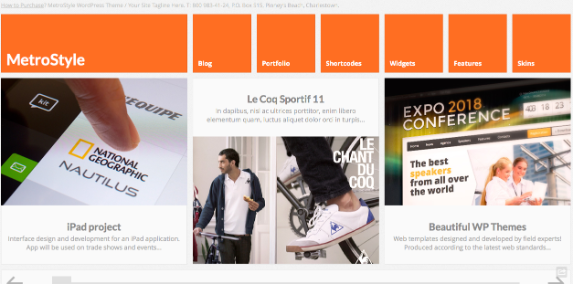
I also found the MetroStyle theme ($45), which I rejected for having too many boxes at the top:

MetroStyle WordPress theme

I downloaded and installed the WP Metro theme (£FREE), but I had trouble making it look decent with my content:

WP Metro theme for WordPress

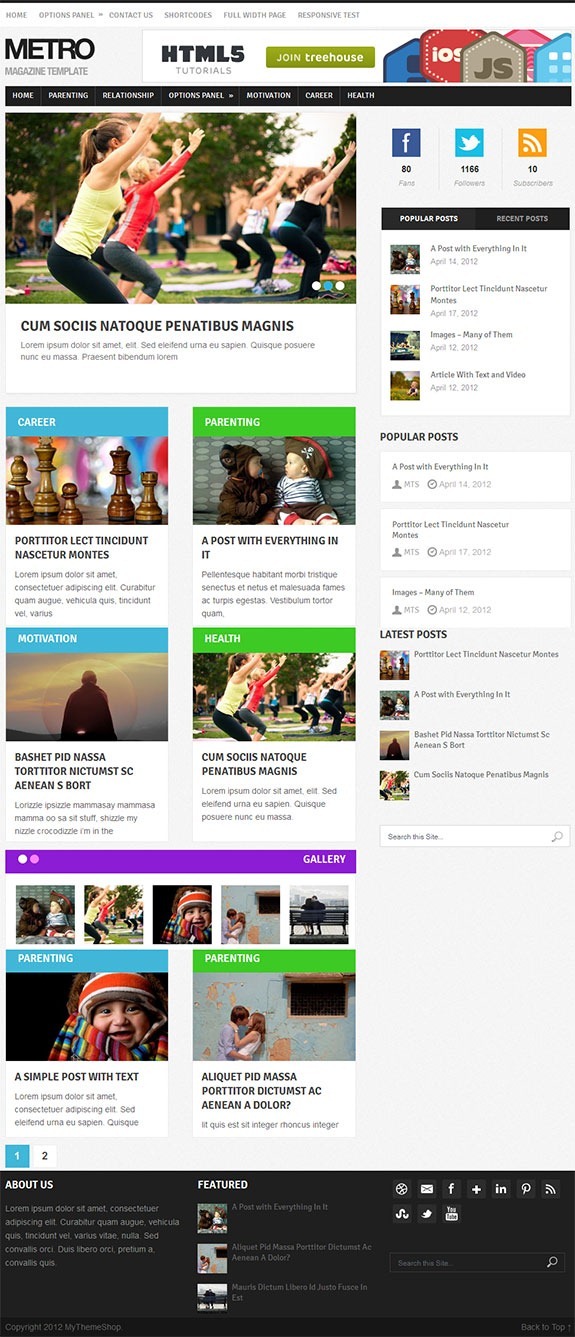
In the end, after considering signing up to a course to get the Anaximander theme, I decided to pay $35 for a WordPress theme entitled Metro:

Metro theme for WordPress

Like many premium themes it comes with an extremely easy-to-use configuration dashboard in addition to the usual WordPress options. Nevertheless, old habits die hard and I delved into the CSS to tinker about a bit!

I hope you like what you see, and if you want to see the ‘responsiveness’ in action, either resize your browser window or visit this site on a mobile device. It’s only my first attempt – I’ll be tinkering around making improvements here and there over the next few weeks.

Any feedback is gratefully received!

Notes:

HOWTO: Issue #openbadges in 5 steps using WordPress + WPBadger

Image slideshow not showing? Click here!

Good news! Dave Lester has created a plugin for WordPress that makes issuing Open Badges fairly straightforward.
Follow the instructions below to get started.


1. Install WordPress*

Install WordPress

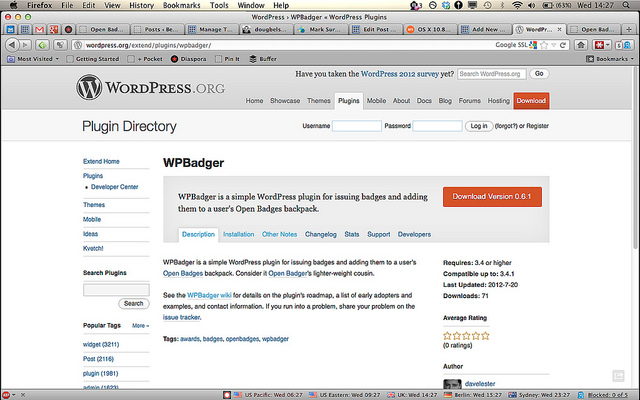
2. Install the WPBadger plugin

Install the WPBadger plugin

3. Follow the instructions at the plugin’s Installation page, specifically:

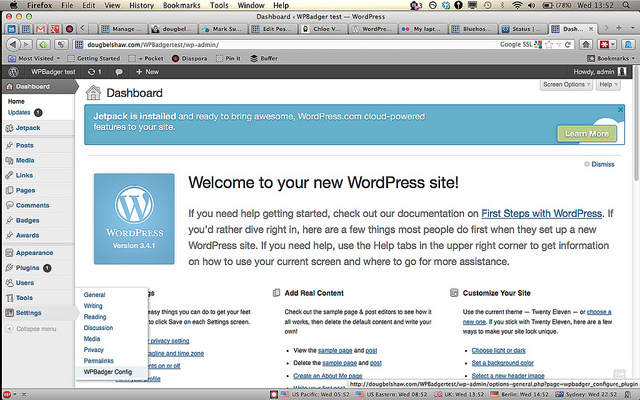
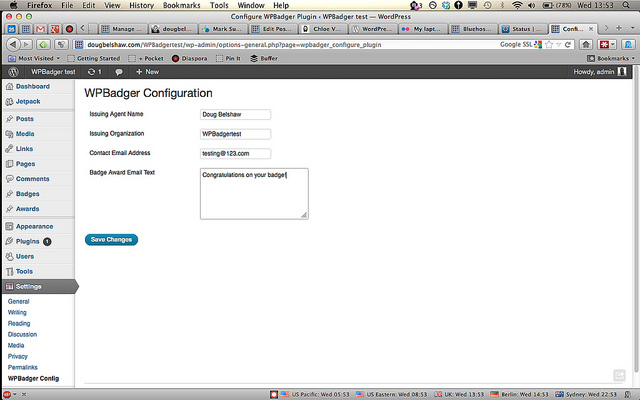
Configure the plugin by navigating to Settings -> WPBadger Config in the WordPress admin. On this form, fill out some basic information including Agent Name, organization, and contact email address. The award email text is optional.

Note the following:

  • After you install the WPBadger plugin you get two new menu items – Badges and Awards
  • Badges is to do with the creation of badges and Awards is to do with the awarding of badges (either individually or en masse)

Configure WPBadger

4. Follow the instructions on the Other Notes page to create your badge.

Things that may help:

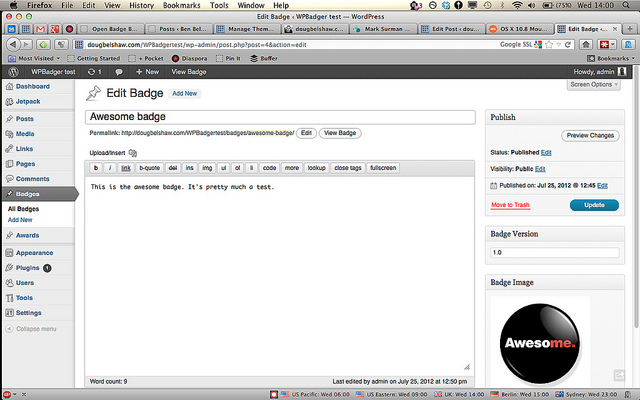
  • Click on Badges in the left-hand menu then Add New
  • Fill in the Enter title here box (this is the name of the badge as it will show up in Badge Backpacks)
  • Enter some text in the main field about the badge itself and what it’s awarded for (this is what will show up at the badge’s Criteria URL)
  • Under Badge version on the right-hand side enter a number such as 1.0
  • Under Badge image on the right-hand side click on Set featured image
  • Once you’ve uploaded the badge image (a PNG file) you need to scroll down in the pop-up box to click the option to Use as featured image and then close the pop-up (you don’t need to insert it into the post)

Create your badge

5. Follow the instructions on the Other Notes page to award your badge.

Things that may help:

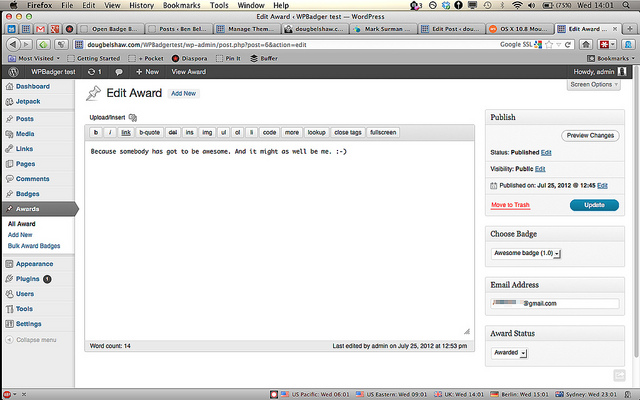
  • Click on Awards then Add New to award a badge to a single individual
  • Use the drop-down menu under Choose Badge on the right-hand side to select the badge to award
  • Enter the individual’s Email Address in the box on the right-hand side (try your own email address first if testing!)
  • In the main box fill out the reason why the individual has been awarded the badge (this is what will show up at the badge’s Evidence URL)
  • Press Publish

Award badge

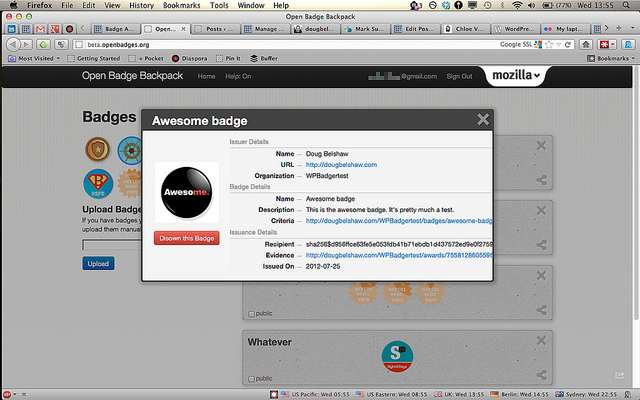
The individual you entered in Step 5 should now receive an email telling them they’ve received a badge. When they click on the URL they can accept or reject that badge. If they accept it then it will be pushed to their Badge Backpack.

Badge in Open Badges Backpack

*How to do this is outside of the scope of this tutorial, I’m afraid.

css.php