
Using Raspberry Pi and XBMC to build an ultra-cheap HTPC.
Back in 2006/7 I used to use XBox Media Center (XBMC) on my original XBox to play films and show pictures on our television. Since then XBMC has become a cross-platform homebrew juggernaut, available for almost every platform. And that now includes the Raspberry Pi, a low-cost device to stimulate interest in Computer Science.
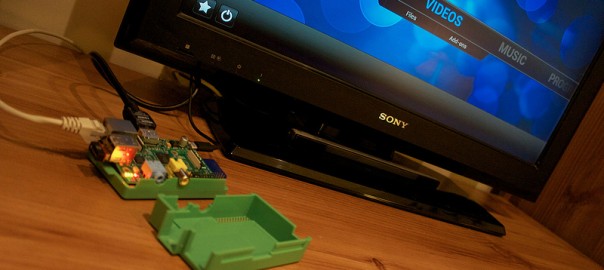
I’m not going to wax lyrical about my computing history, but suffice to say I’ve spent a decent amount of time looking for the perfect Home Theatre PC (HTPC) setup. At the moment we’re using a PlayStation 3 with the PlayTV accessory. It’s a great, easy-to-use (and visually appealing) solution, but a proprietary one that uses a fair amount of power. The Raspberry Pi on the other hand can be powered from the USB port on my television whilst outputting silky-smooth 1080p video. Amazing.
With every week that passes it seems that it’s possible to do ever more with a XBMC-powered Raspberry Pi but, at the moment, here’s what I’m using mine for:
- Streaming videos from our Network Attached Storage (NAS) drive
- Playing photos, videos and music (including Spotify) from our iPad via Airplay
- Catching up with BBC iPlayer (as well as catch-up services from other channels)
Given that there’s free XBMC apps for both iOS and Android devices navigation via wifi on a tablet or phone is a breeze. It feels like using a much more expensive device.
How to get started
If you want to do what I’ve done then it couldn’t really be much easier:
- Buy a Raspberry Pi (and a case, if you want one)
- Find an SD card (2GB is plenty big enough)
- Use a Mac and XPi installer
- Put the SD card in the Raspberry Pi
- Hook the Raspberry Pi up to power and a screen
- Enjoy!
- (optional) Follow some of the advice here and install add-ons not in the built-in repository (such as BBC iPlayer)
Bingo.