Update (January 2015): Although the self-hosted approach detailed in this post worked really well for the six months I tried it, I’m now using Fastmail.
Introduction
On Friday, I decided to ditch Gmail. It had been a long time coming, to be honest.
I’m not really interested in having a debate whether or not I ‘should’ do this, or whether it’s objectively a good thing to do. I just had an epiphany when I realised that almost all of my data (e.g. search, email, analytics) was going via Google’s servers. It’s like some kind of legitimised man-in-the-middle attack.
Instead of Gmail, I’m using webmail on my own domain and (shared) server. It was a pretty straightforward process. Here’s how to do it:
- Set up self-hosted email inbox
- Forward (and archive) email
- Import folders and email
- Update email addresses around the web
1. Set up self-hosted email inbox
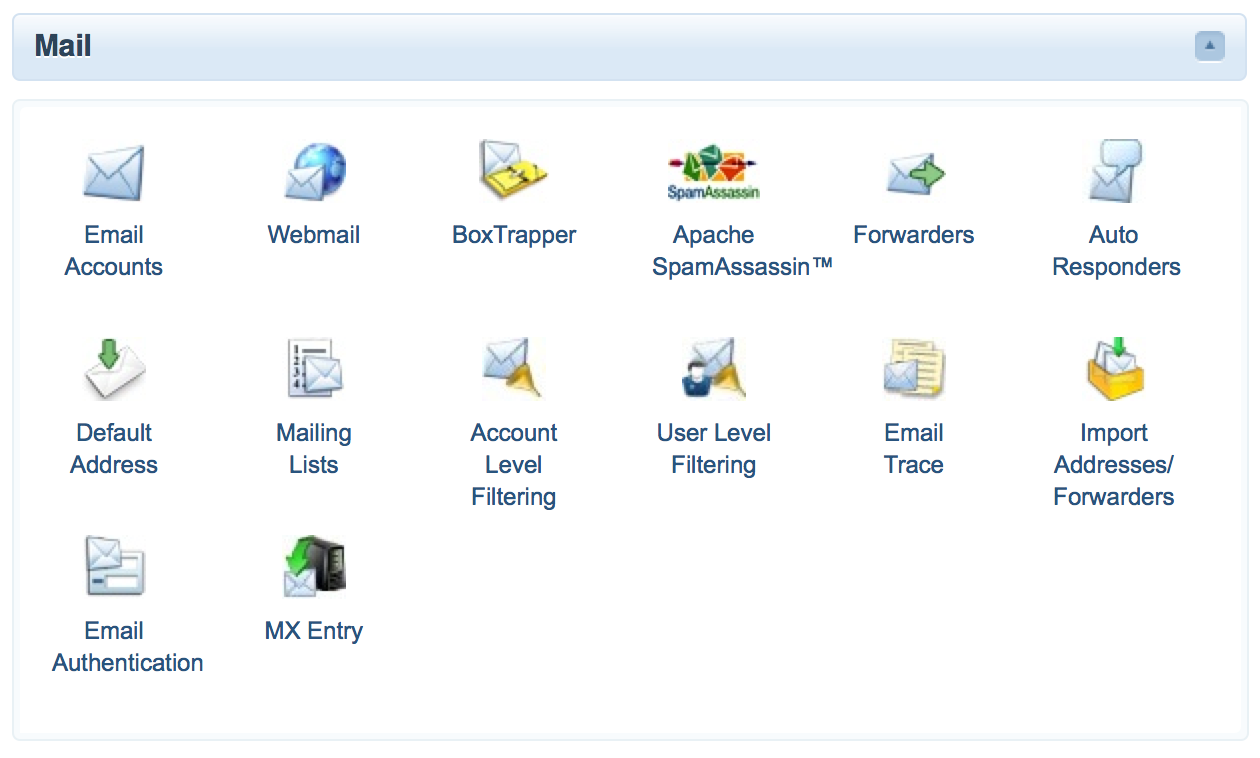
I’m using Reclaim Hosting, which comes with something called ‘CPanel’ installed. This makes it much easier to install and maintain apps and services.
Sign up for a web host that has CPanel. Login, and go to the ‘Mail’ section of CPanel:
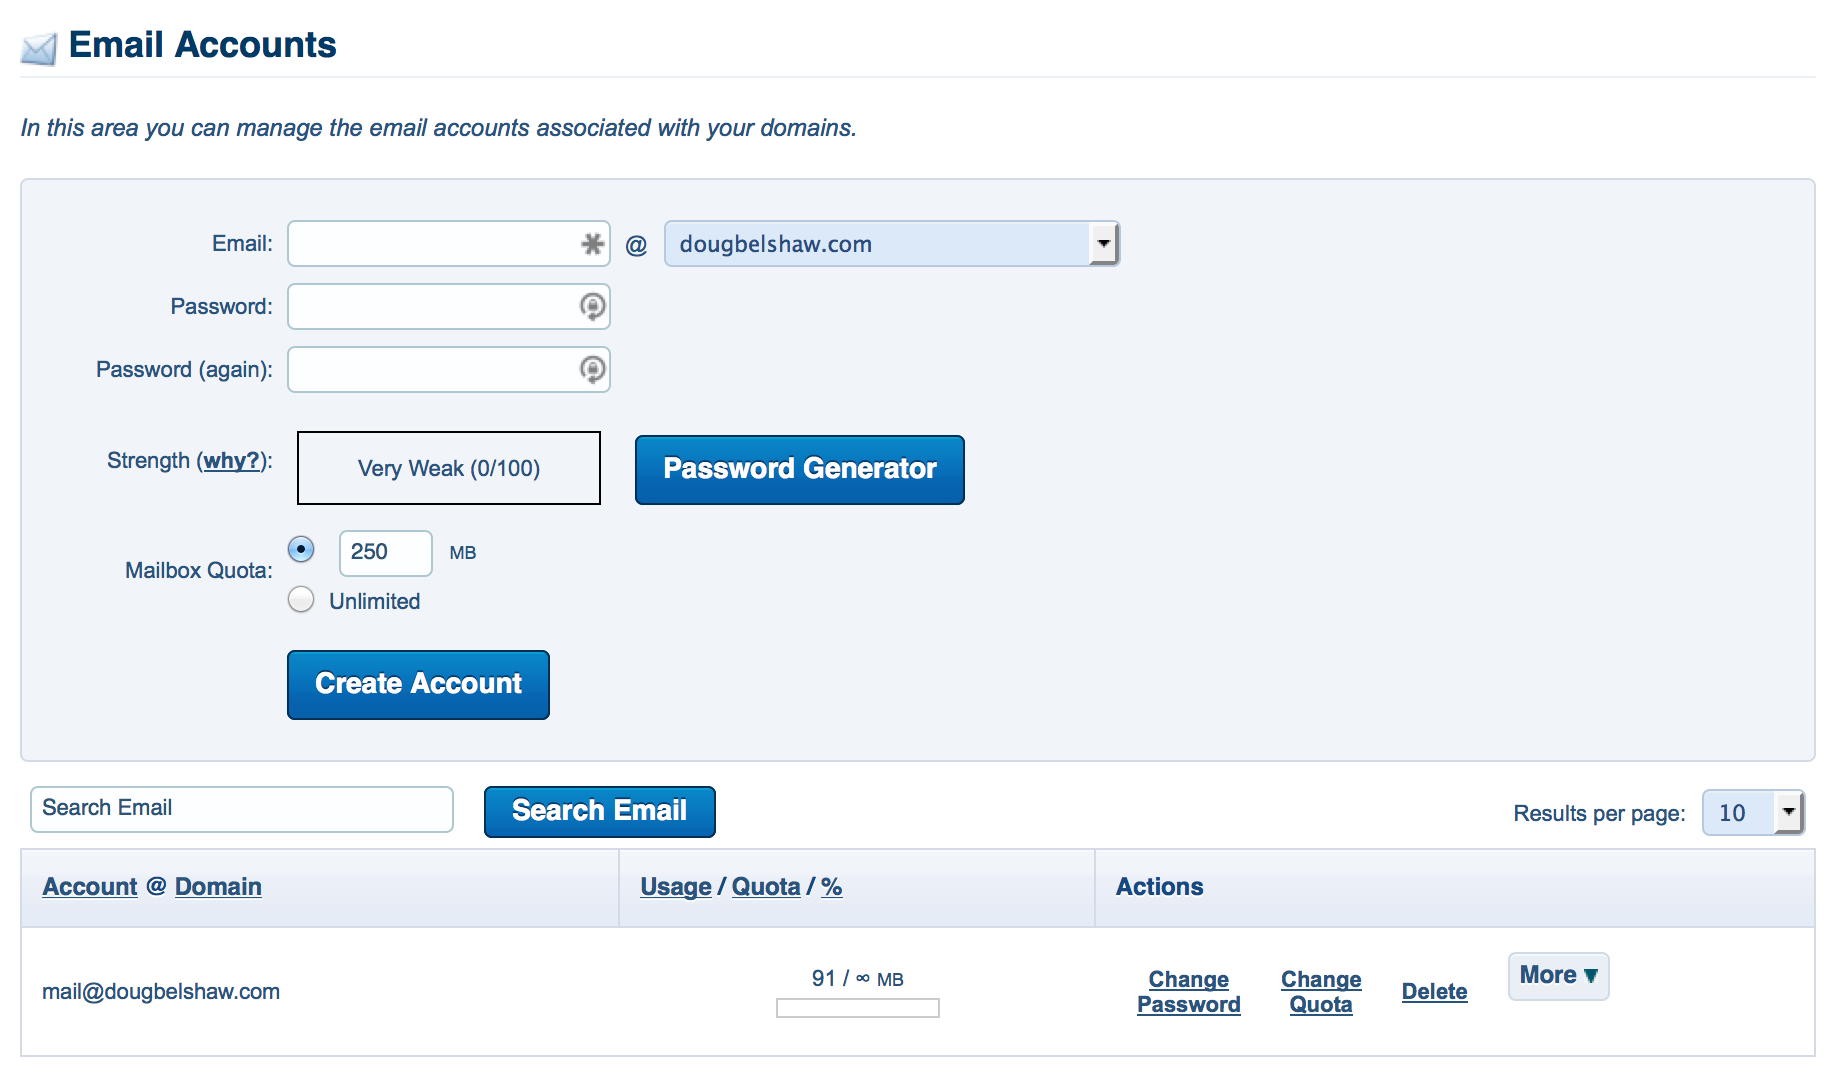
Click on the ‘Email Accounts’ option. Fill in the email address and password – for example, I chose [email protected]
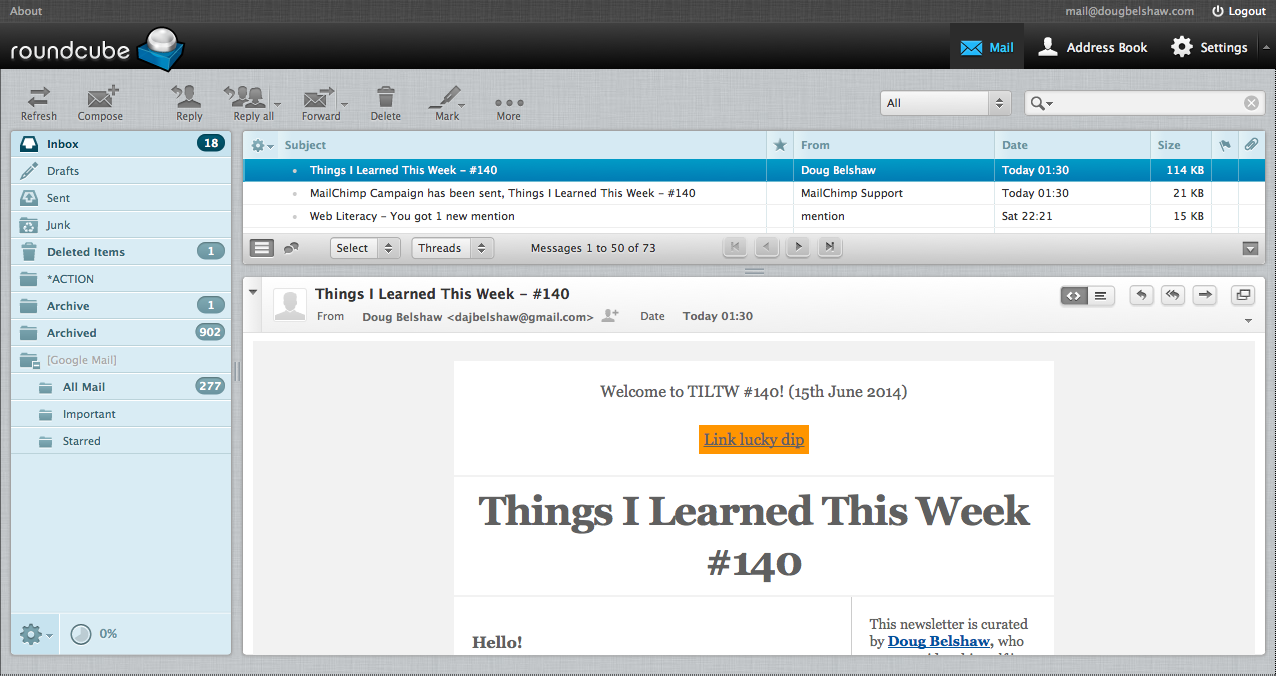
You can now access your new email inbox by appending ‘webmail’ to your domain name – e.g. dougbelshaw.com/webmail. You have a choice of interfaces to access your email inbox. I chose Roundcube:
2. Forward (and archive) email
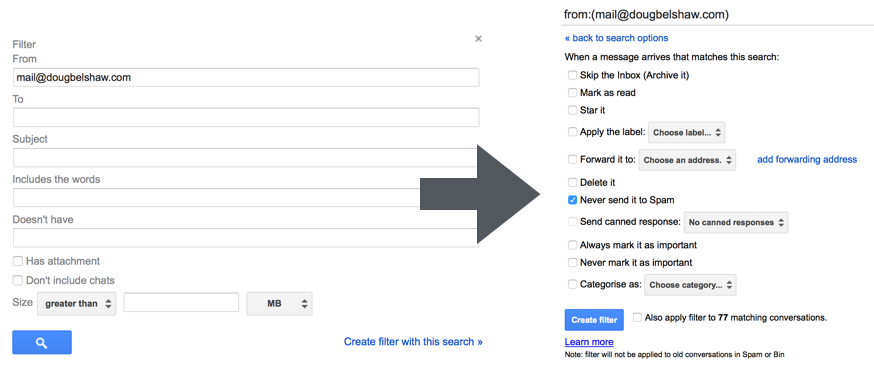
The first thing you want to do is make sure that you continue to get the email sent to you in one place. To do that, you need to forward all of the email that comes to your Gmail account to your new self-hosted email inbox.
In Gmail, click on the gear icon and go to ‘Settings’. Once there click on ‘Forwarding and POP/IMAP’:
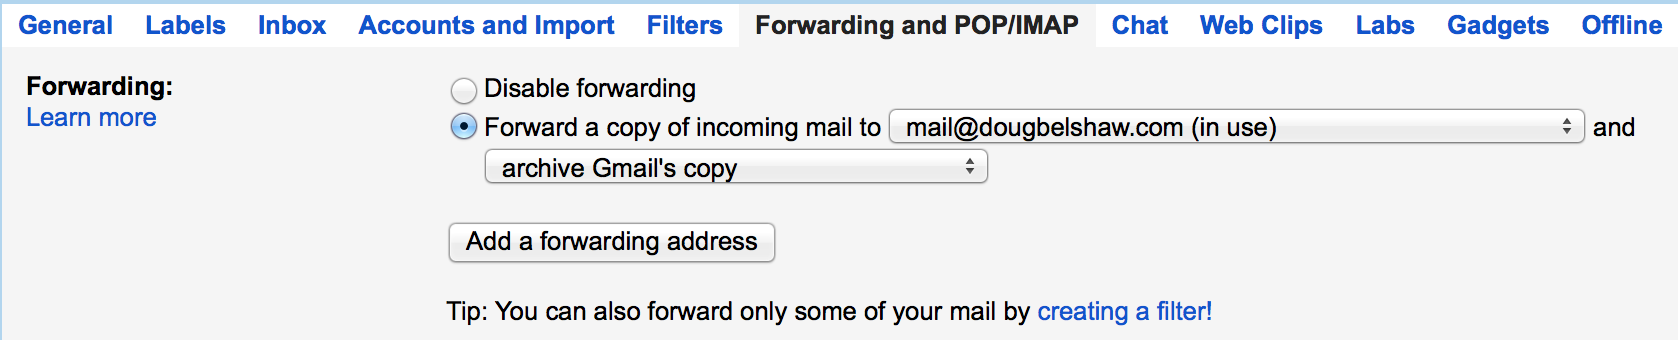
Choose ‘Forward a copy of incoming mail to…’ and input the self-hosted email you set up in Step 1. You’ll have to confirm that account by clicking on a link that Google send to your new email address.
I chose to ‘archive Gmail’s copy’. It’s up to you what option you choose here.
3. Import folders and email
This is the bit that takes the longest. In fact, you can leave this running overnight and/or be doing Step 4 while this is happening.
Unless you’re declaring email bankruptcy, you’ll need to transfer your existing emails and folders from Gmail to your new self-hosted email account. Step 2 only redirects all new emails received.
First, you’ll need to use an email client like Mozilla Thunderbird (cross-platform) to download all of your Gmail folders and emails. To set it up, download Thunderbird and then launch it.
You’ll see something like this:
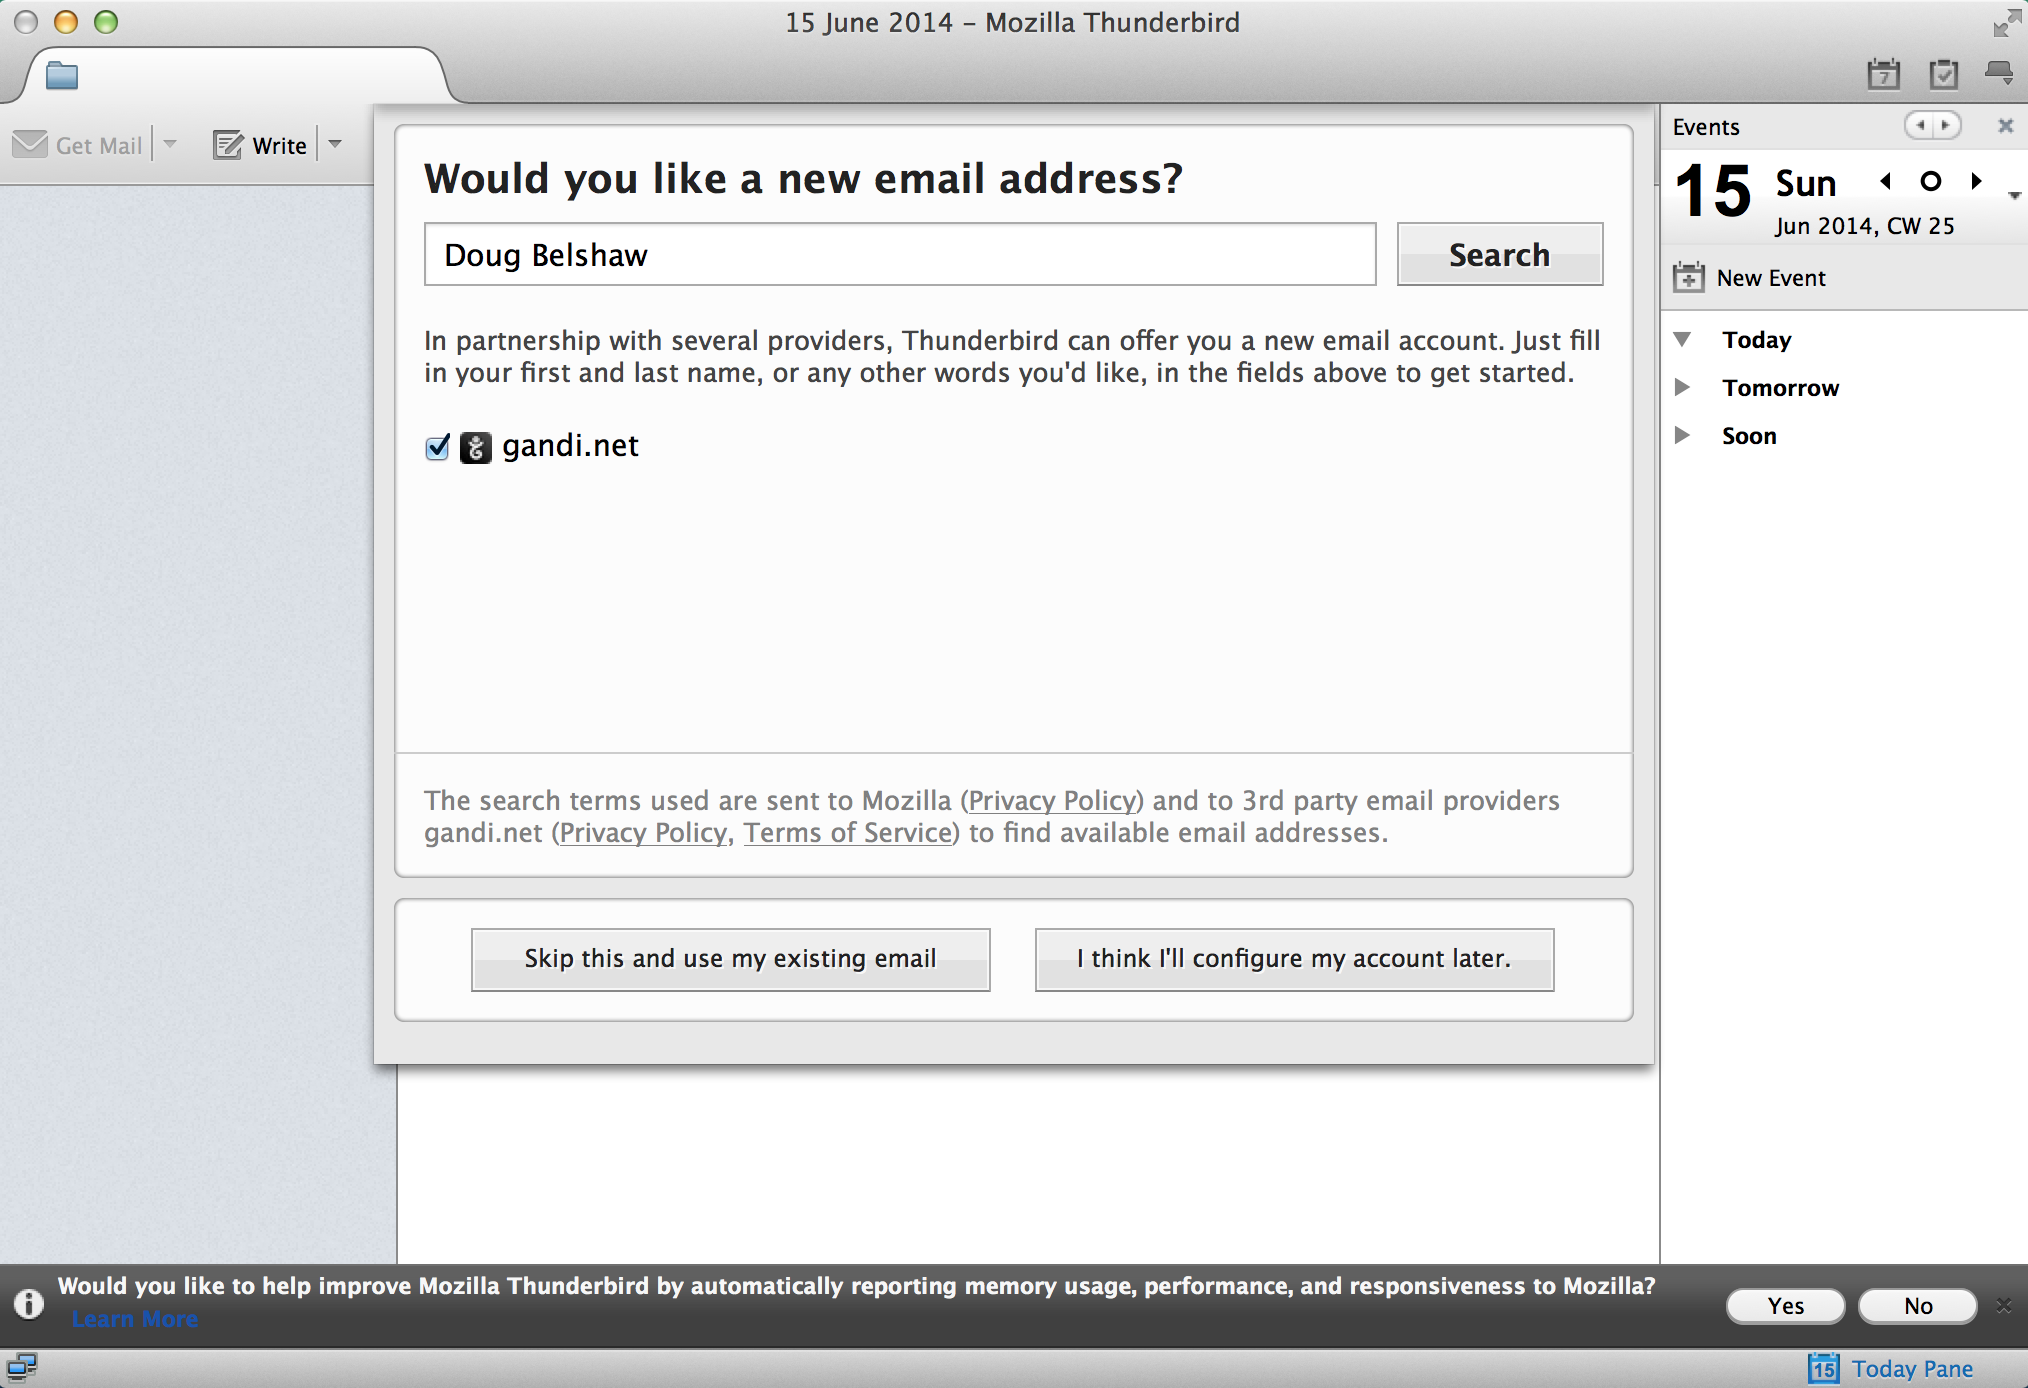
You’ve already got an email address, so click ‘Skip this and use my existing email’.
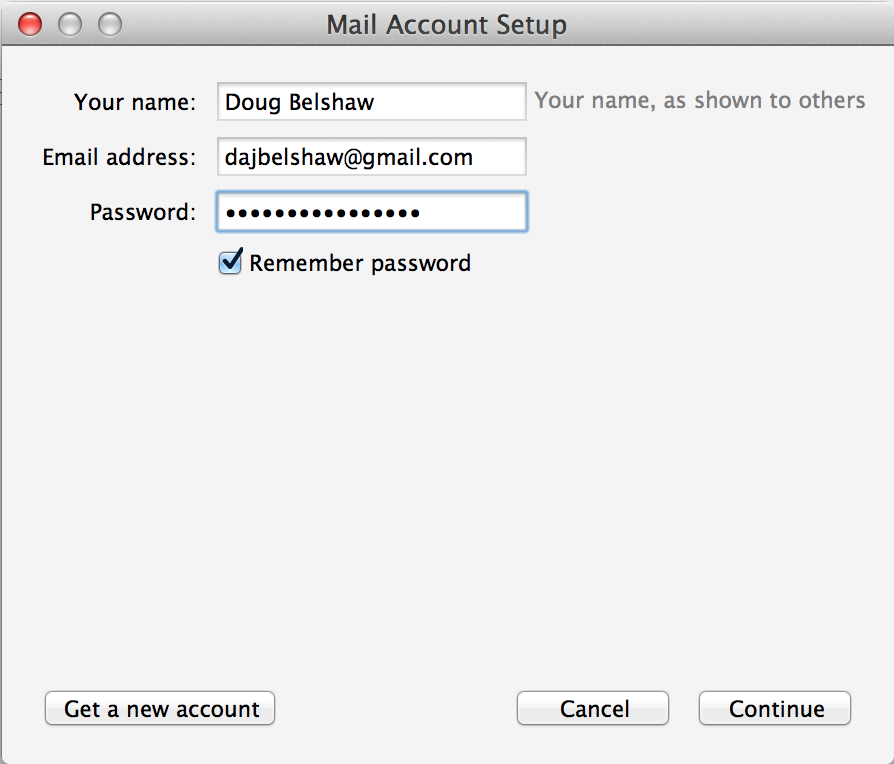
Add your Gmail account first by entering your name, email address and password. Remember, if you’ve got two-factor authentication turned on for your Google account, you’ll need an ‘App password’ from your security page.
The default option is to connect via ‘IMAP’ which is what we want so leave it as it is and press ‘Done’. You should then see Thunderbird importing all of your folders and emails. This will take a long time.
Note: ‘folders’ in Gmail are known as ‘labels’.
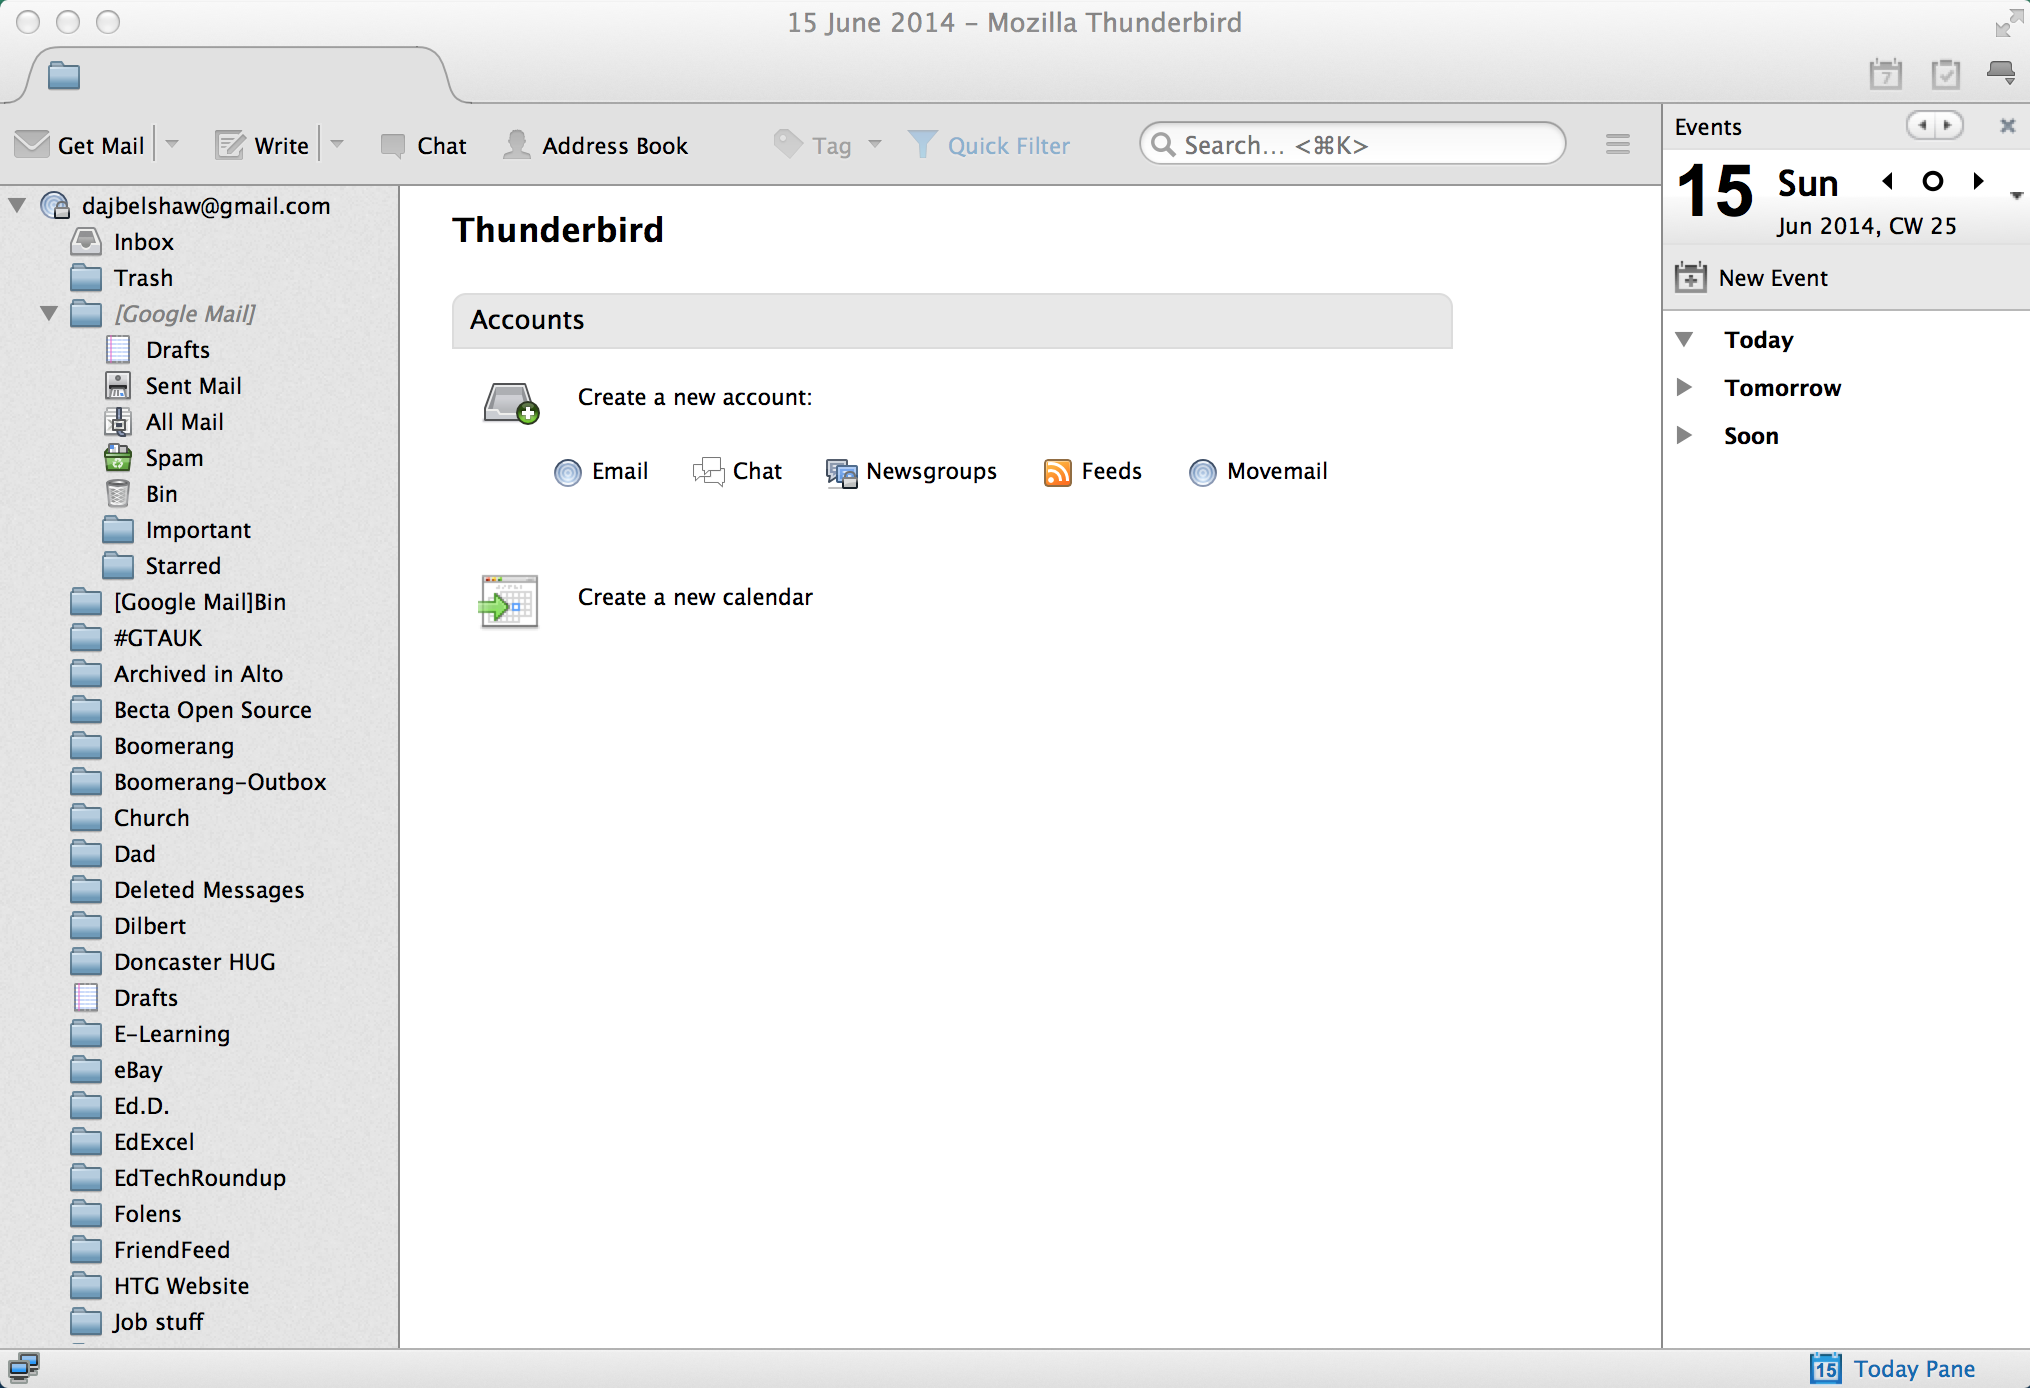
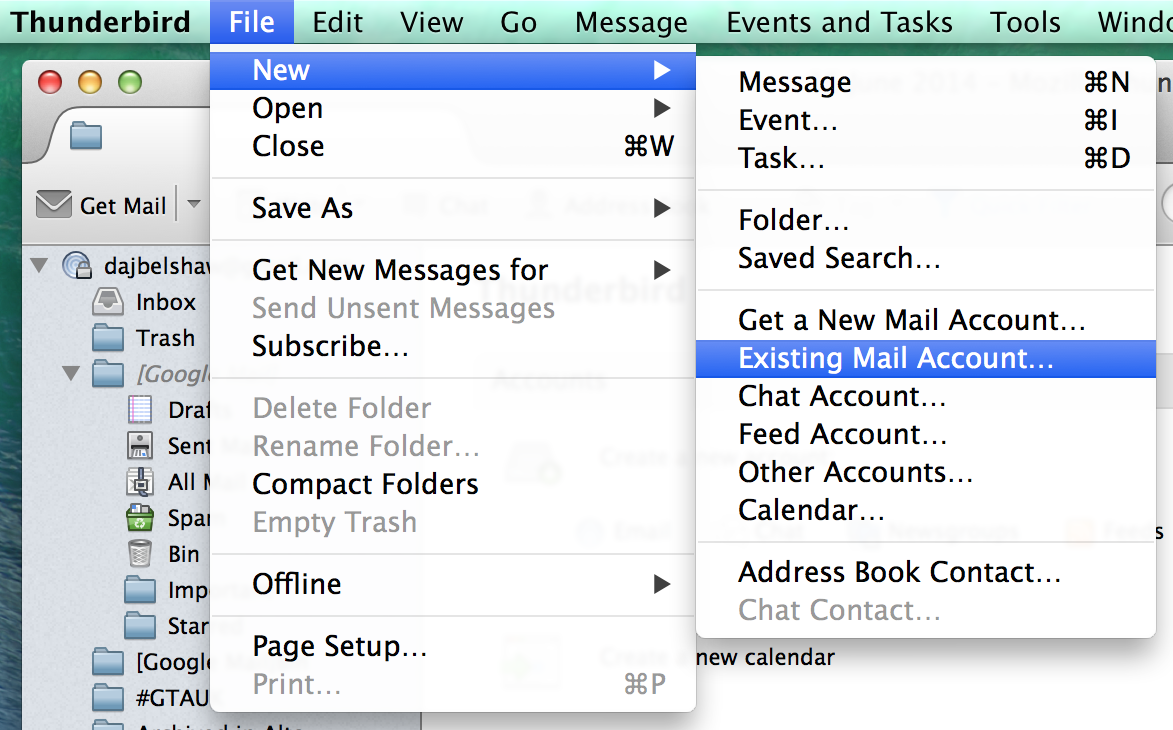
Now you need to add the self-hosted email account you set up in Step 1. To do this go to the menu and choose ‘New’ and then ‘Existing Mail Account’:
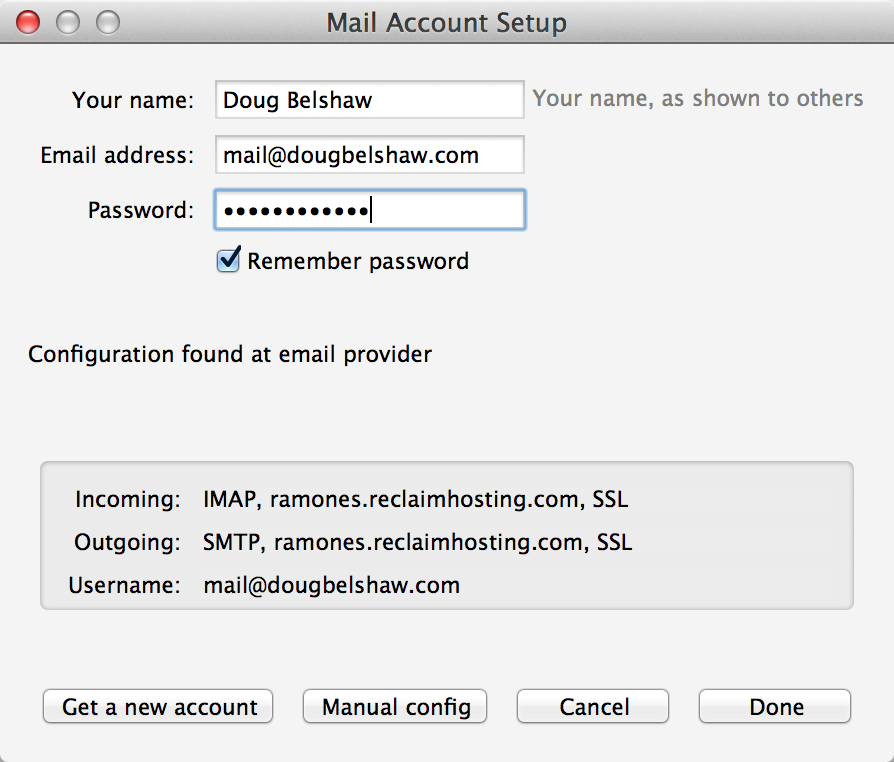
You’ll see the same box from when you added your GMail account. This time add your email address and password to the account you set up in Step 1.*
Click ‘Done’ and you now have both your Gmail and self-hosted email account syncing with Thunderbird.
Now you need to select all of your Gmail folders/labels and drag them to your self-hosted account.
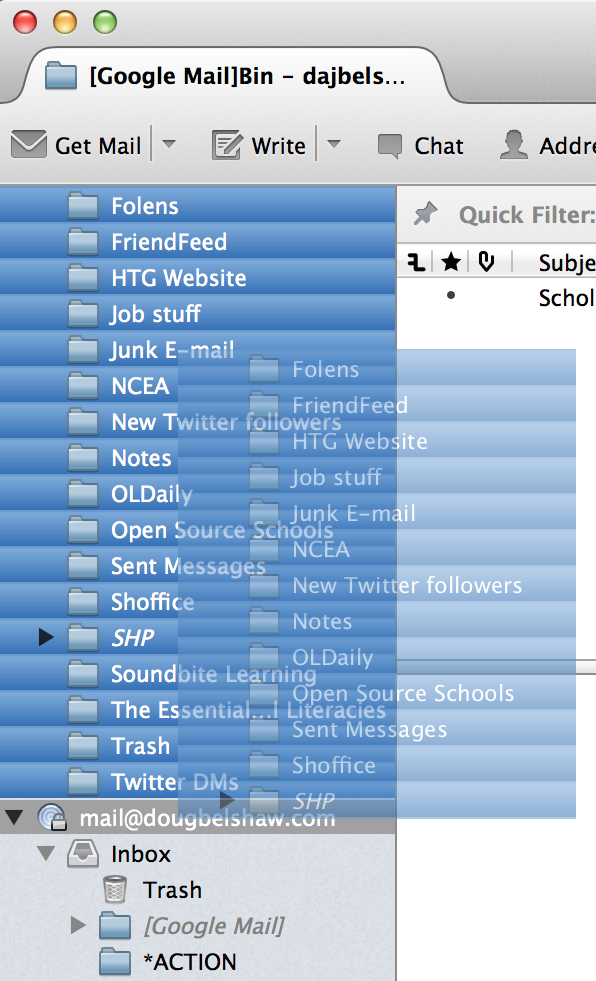
Be careful to drag them onto the email address rather than ‘Inbox’ – otherwise the folders you drag will become sub-folders of your inbox rather than folders in their own right. Of course, you can always just drag them to ‘Archive’ if you don’t care.
Now wait. Possibly a very long time if you’re on a slow connection and/or you have lots and lots of emails and folders.
4. Update email addresses around the web
While your email and folders are transferring – and, to be honest, over the next few days/weeks – you’ll need to update your email address with the accounts you have around the web. There’s no great hurry for this, as your Gmail messages will be redirected to your new email inbox, but it’s nice to get things sorted.
You may also want to do one or more of the following:
- send a ‘please update your addressbook!’ email to your contacts
- use an email auto-responder on your Gmail account for a while
- add a message about having a new address to your email signature
EDIT: Remember, if you don’t tell people about your new email address, your emails will still be going via Google’s servers (thus negating the point of the exercise…)
Conclusion
Did you manage to follow these instructions? Have you got a different/better way of doing it? I’d love to hear from you in the comments section below (or via this Hacker News thread)!
*Apart from believing in Open Source software (and working for Mozilla), one of my reasons for using Thunderbird is that it provides auto-setup for a much wider range of services than other mail apps. Also, the reason you see ‘SSL’ here is because I set up https on my domain using StartSSL. That’s outside the scope of this tutorial, but is also probably unnecessary if you’re planning to access your inbox via the webmail interface.
Banner image CC BY David Huang